
Follow Me On Social Media!
Naturally Dyed Easter Eggs: Easy, Vibrant DIY Fun!
Introduction to Naturally Dyed Easter Eggs
Creating naturally dyed Easter eggs is not just a delightful craft; it’s a meaningful way to celebrate a cherished holiday tradition. Imagine gathering around the table with friends, surrounded by vibrant colors sourced straight from nature. As you dip the eggs into bowls filled with earthy, beautiful hues, the experience feels both nostalgic and innovative. This method not only adds a personal touch to your Easter festivities but also encourages a sustainable approach to one of the season’s favorite pastimes.
What makes naturally dyed Easter eggs special? The magic lies in the ingredients you use to create stunning colors without any artificial additives. Think deep golden yellows from turmeric, soft blues from red cabbage, and rich reds from beets. These natural dyes are not only easy to make but also celebrate the beauty of the ingredients themselves. By incorporating these colors into your egg decorating, you’re fostering a connection to the earth and embracing a more environmentally friendly way of celebrating.
There’s something uniquely satisfying about transforming humble ingredients into works of art that you can proudly display in your home. Each egg tells a story—from the journey of the ingredient to the memories made while dyeing them with loved ones. Plus, these eggs can double as beautiful table decor that adds a warm, organic touch to your Easter brunch.
As you embark on this colorful adventure, you’ll find that using natural dyes opens the door to creativity. Not only can you experiment with various ingredients, but you can also mix and match to create custom shades that reflect your personality and preferences. So, gather your loved ones, prepare for some good-natured mess, and dive into the wonderful world of naturally dyed Easter eggs. Let’s explore how these vibrant creations can elevate your holiday celebrations while nurturing a love for nature and craftsmanship.
Key Ingredients for Naturally Dyed Easter Eggs
Eggs: To craft naturally dyed Easter eggs, start with fresh, organic eggs if possible. They tend to have thicker shells and yield brighter colors. If you’re up for a little fun, consider using white eggs for a more vibrant finish, while brown eggs will give you softer, earthy tones.
Vinegar: A splash of distilled white vinegar is crucial for this dyeing process. It acts as a fixer, allowing the colors to bond better to the eggshells. Without it, your beautiful hues might wash away during rinsing.
Natural Dyes: Get creative with various foods like red cabbage for blue, beets for a lovely pink, and turmeric for sunny yellow. This allows not only for vibrant colors but also a storytelling element; each hue adds a personal touch to your Easter celebration.
Water: You’ll need water to boil the eggs and mix with your dye ingredients. Keeping it at a gentle simmer ensures your eggs cook evenly.
Salt: A pinch of salt helps to set the colors so that your dyed eggs can last longer as cherished decorations.
Why You’ll Love This Recipe
Creating naturally dyed Easter eggs is an age-old tradition that brings a splash of color and creativity to the holiday. From the moment you dip that hard-boiled egg into a vibrant hue, there’s a thrill that can’t be matched. Imagine gathering with friends or family around the kitchen table, laughing and sharing stories while your hands transform simple eggs into works of art.
Embrace Unique Colors
What makes this recipe truly special is the use of natural ingredients to achieve a palette that’s both beautiful and safe for the environment. You might be surprised to discover how vibrant colors can emerge from everyday foods like beets, turmeric, and red cabbage. It’s not only fun to experiment with different combinations but also incredibly satisfying to see the transformation unfold right before your eyes.
Easy and Family-Friendly
The process is straightforward, making it ideal for an afternoon filled with laughter and creative experiments. You can involve everyone in your household, from toddlers to grandparents, turning it into a family bonding experience. And let’s not forget that the end product isn’t just pretty to look at; they make for stunning centerpieces or delightful gifts for loved ones.
A Meaningful Tradition
By crafting these naturally dyed Easter eggs, you’re not just decorating; you’re creating lasting memories and instilling the joy of creativity in future generations. So gather your friends, grab those colorful veggies, and get ready to roll up your sleeves because these eggs are going to be a highlight of your Easter celebrations!
Variations on Naturally Dyed Easter Eggs
Crafting naturally dyed Easter eggs transcends mere tradition; it’s an opportunity to explore creativity and connect with nature. Once you master the basics, the fun lies in experimenting with different colors and techniques to make each egg uniquely yours.
Vibrant Colorations from Fruits and Vegetables
- Beet Juice: This deep, rich color offers a stunning crimson hue. Simply boil the beets in water, strain the juice, and soak your eggs for a striking result.
- Turmeric: Known for its vibrant yellow, turmeric is incredibly easy to use. Mix a tablespoon with hot water, and let your eggs soak until they reach your desired shade of sunshine.
Natural Additive Techniques
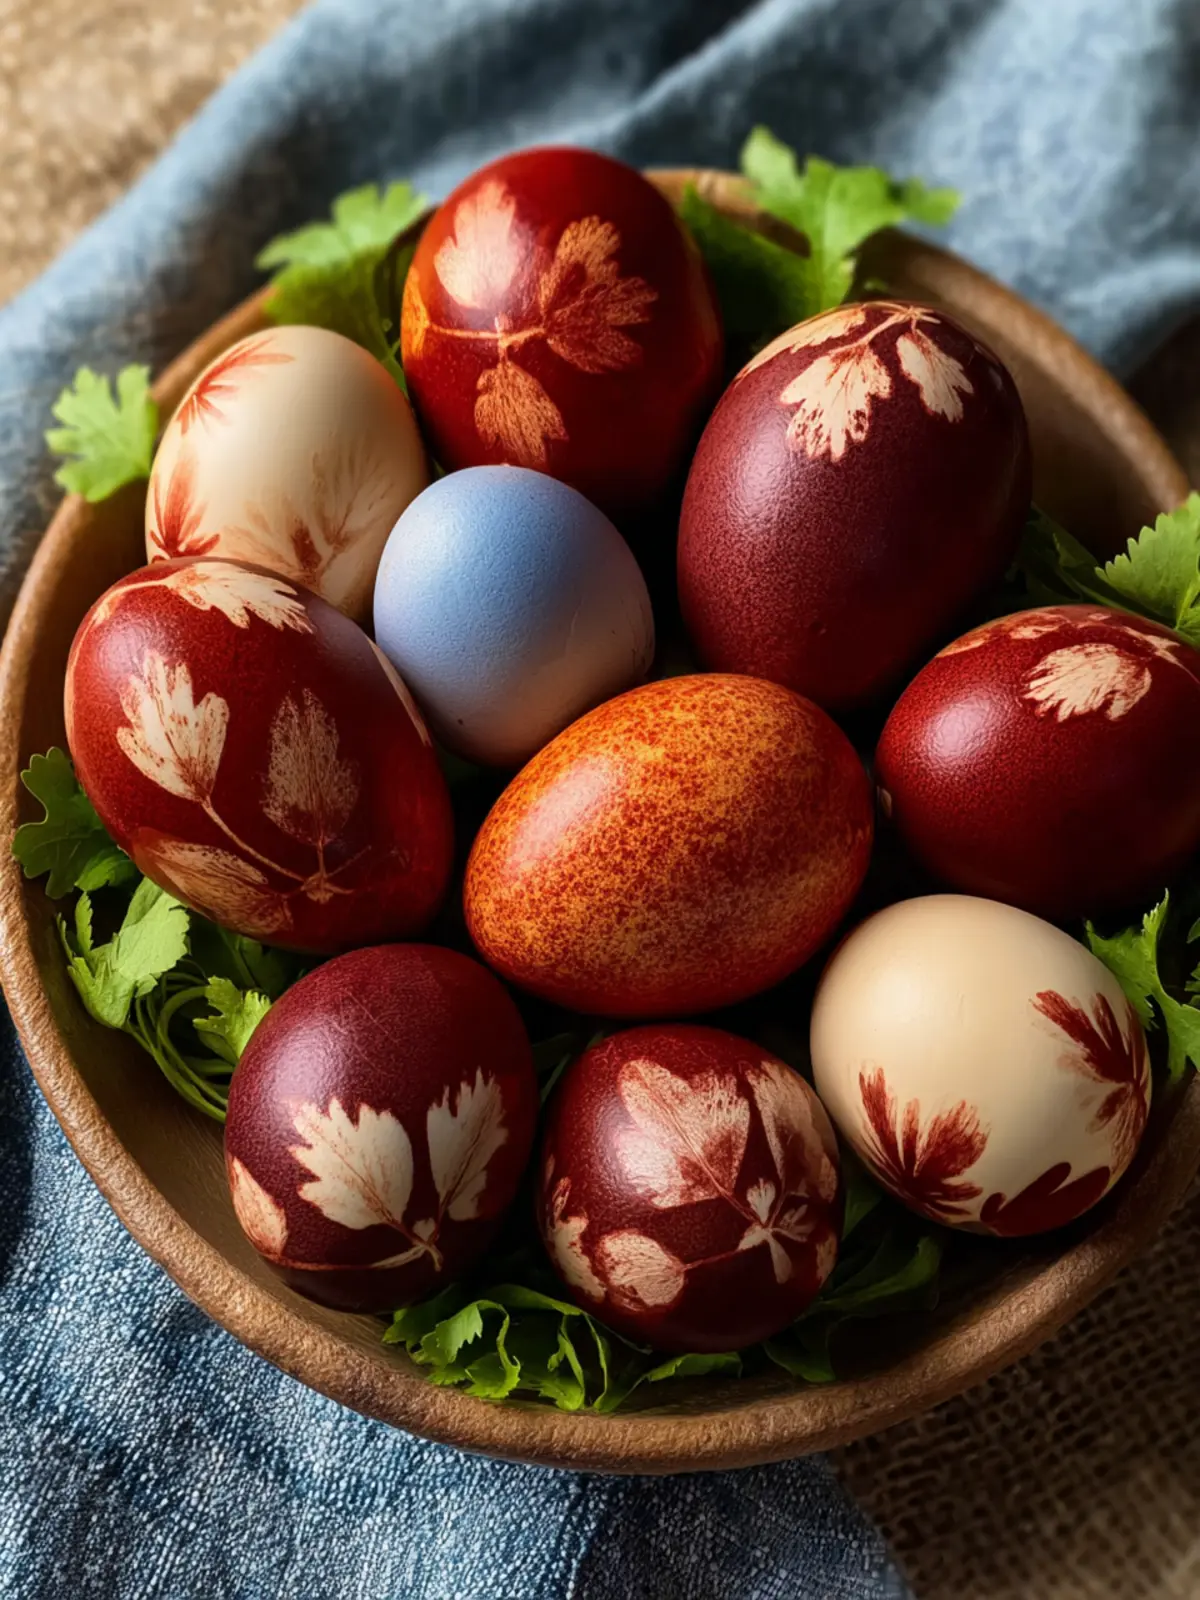
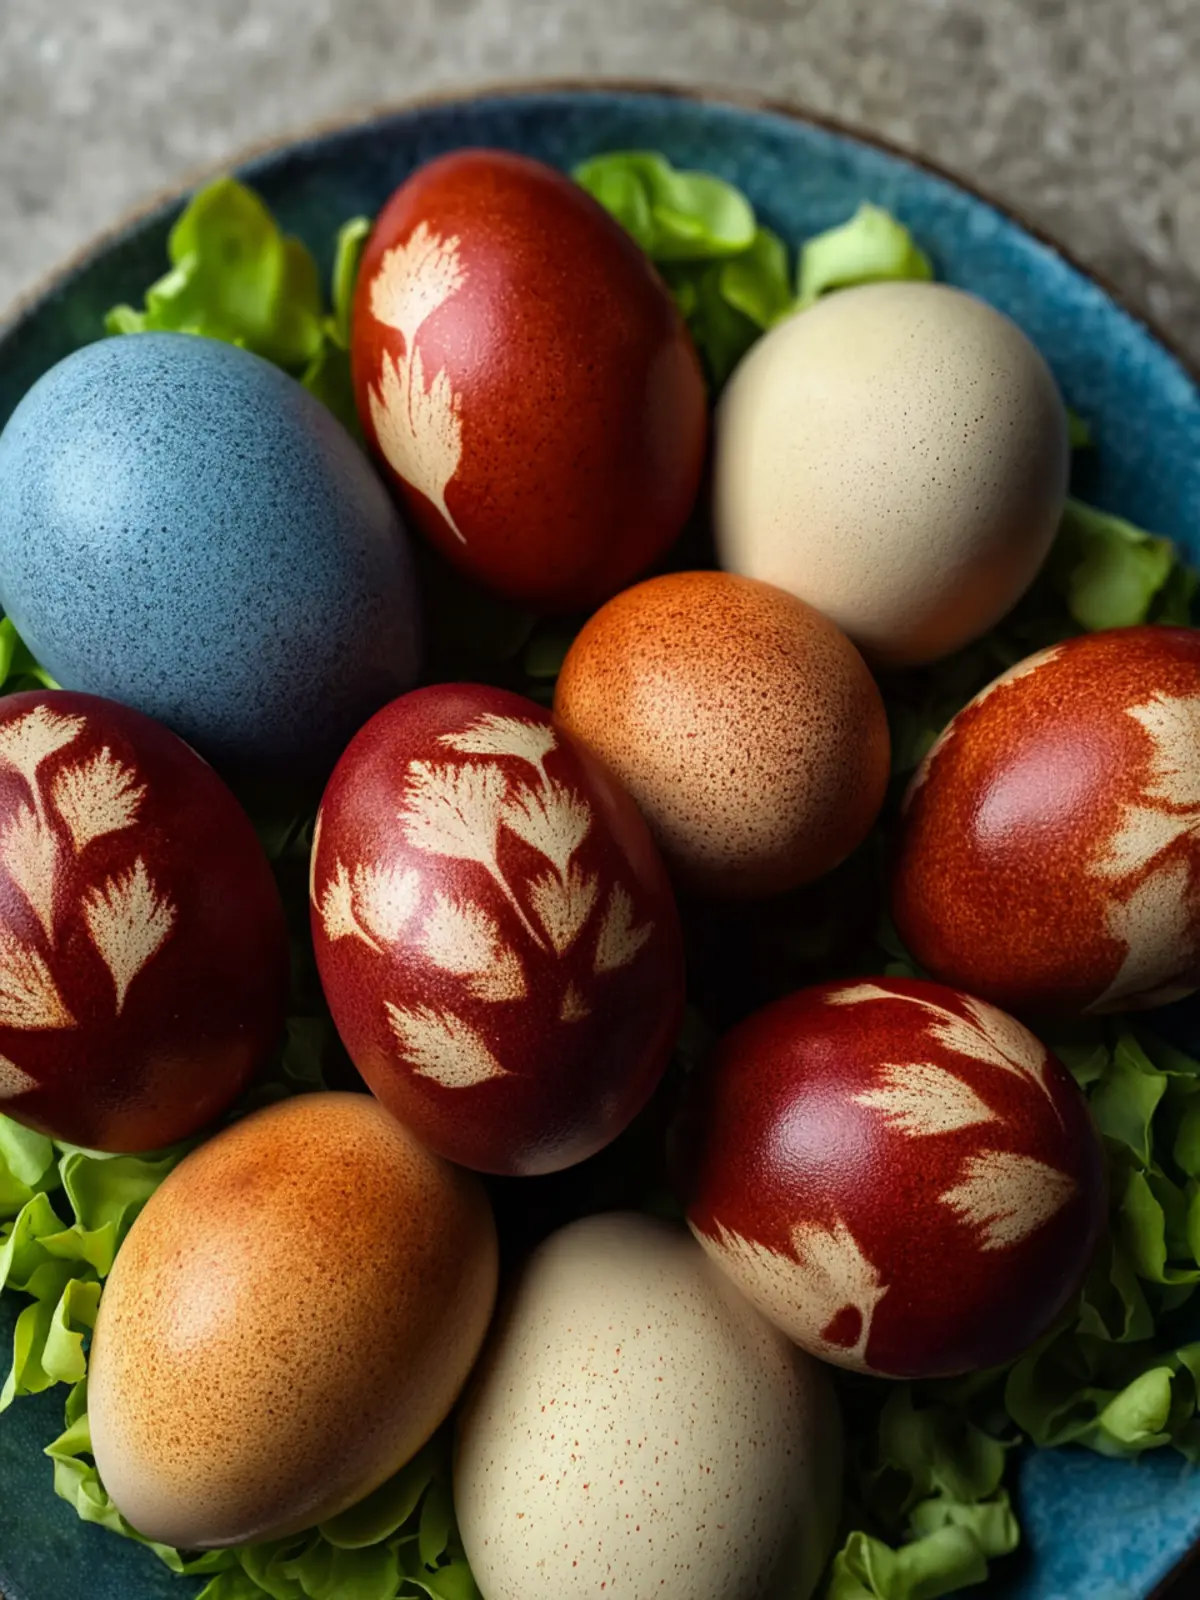
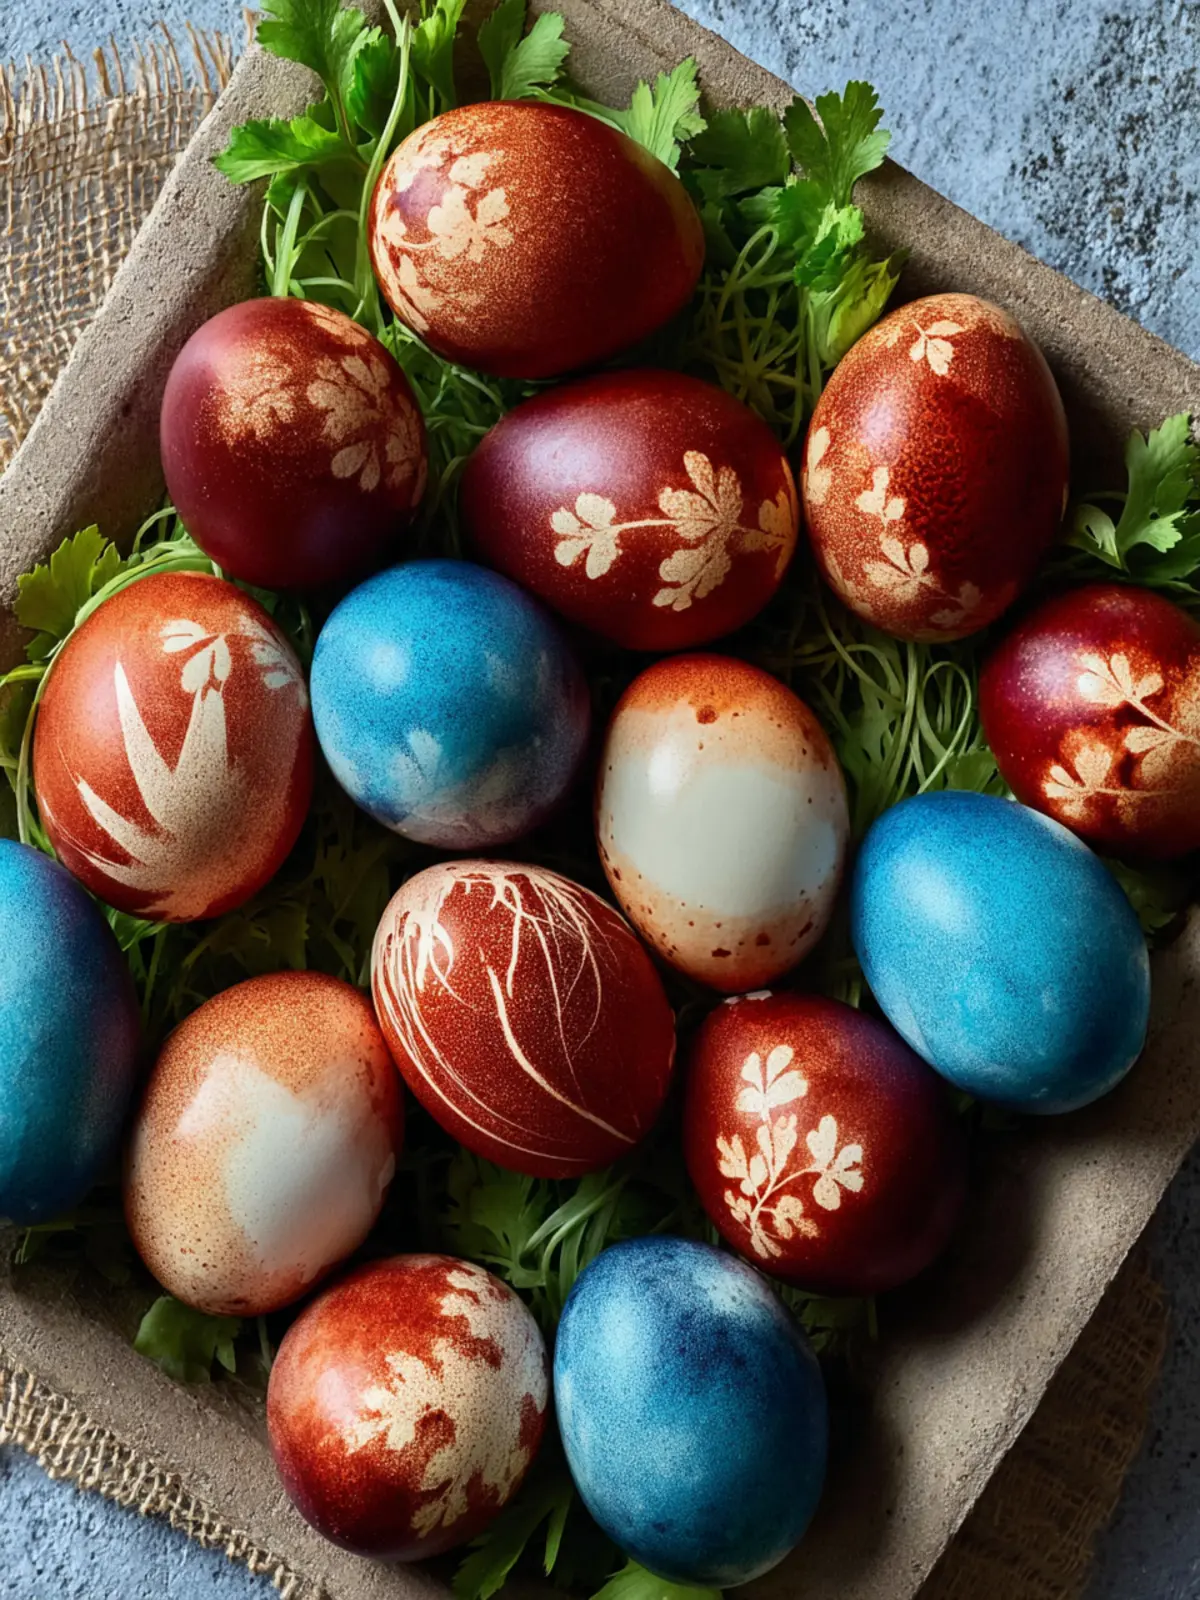
- Onion Skins: Wrap your eggs in onion skins before boiling. The skins transfer beautiful patterns and shades of gold to your eggs, creating a rustic charm that’s hard to resist.
- Coffee Grounds: Don’t toss those used coffee grounds! They can impart a lovely brown hue. Steep them in hot water, and let your eggs soak to absorb the warm tones.
Unique and Personal Touches
Add personal flair by using natural embellishments, such as:
- Flower Petals: Pressed flowers or leaves can be used for beautiful designs. Wrap these around your eggs before dyeing for a beautiful botanical touch.
- Food-safe Markers: After dyeing, use these to add intricate patterns or messages, enhancing the personal touch of each egg.
By diversifying your dyeing techniques and using what’s readily available, you can create a truly one-of-a-kind Easter egg display that reflects your personal style and a little bit of nature’s charm.
Cooking Tips and Notes for Naturally Dyed Easter Eggs
Creating naturally dyed Easter eggs is a delightful blend of creativity and tradition. As you embark on this colorful journey, keep these tips and notes in mind for the best results.
Choose the Right Eggs
For a vibrant finish, start with white eggs as they provide the best canvas for natural dyes. Brown eggs can yield softer hues, which might be charming in their own right. Just ensure your eggs are clean and dry before dyeing.
Preparing Your Dyes
The variety of materials you can use for dyes is extensive, from onion skins to beet juice to cabbage. Here are a few pointers:
- Experiment with Quantity: The more plant material you use in your dye bath, the richer your colors will be. Start with a cup of chopped veggies or herbs for every two cups of water.
- Pre-soak Eggs: For deeper colors, consider soaking your eggs in vinegar for 10-15 minutes before dyeing; this helps the colors set better.
Timing is Everything
Patience is a virtue here. Allow your eggs to soak for a few hours or even overnight for the best color payoff. If you’re aiming for a specific hue, check the eggs periodically to avoid oversaturation.
Finishing Touches
Once your naturally dyed Easter eggs have reached your desired shade, rinse them gently in cold water and let them air dry. A natural finish can be enhanced with a drop of vegetable oil for a glossy look—just a little goes a long way.
By following these tips, you’ll make the egg-dying process both rewarding and enjoyable! Happy dyeing!
Serving Suggestions for Naturally Dyed Easter Eggs
When it comes to enjoying your naturally dyed Easter eggs, presenting them beautifully can make all the difference. While you could simply place them in a bowl, why not turn the experience into a festive gathering? Here are some delightful suggestions:
-
Egg Hunt Decor: Scatter your naturally dyed eggs around your garden or living space for an engaging egg hunt. Use natural materials like grass or flowers to create a charming nest for the eggs.
-
Easter Brunch Centerpiece: Arrange your naturally dyed eggs in a decorative bowl, surrounded by fresh herbs or seasonal flowers. This colorful display can become the highlight of your brunch table.
-
Personalized Place Settings: Add a personal touch by writing each guest’s name on their egg using a food-safe marker. It makes for a delightful twist on traditional place cards.
-
Culinary Creations: After the festivities, incorporate these beautifully dyed eggs into your meals. Think deviled eggs, salads, or even as a decorative topping for your favorite dishes.
Remember, these naturally dyed Easter eggs not only look lovely but also inspire creativity and connection during the holiday!
Time Breakdown for Naturally Dyed Easter Eggs
Creating naturally dyed Easter eggs can be a delightful way to welcome the spring season. With just a bit of planning, you’ll find that the timing is as colorful as the eggs themselves. Here’s a quick overview of how long you can expect to spend on this charming project.
Preparation Time
Getting started with your naturally dyed Easter eggs takes about 15 minutes. This includes gathering your ingredients and setting up your dyeing stations. Make sure to gather fruits, vegetables, and spices for vibrant colors!
Cooking Time
The die-making process and egg dyeing will take roughly 30 minutes. While the dye simmers, you can hard-boil your eggs perfectly, ensuring they’re ready for their colorful transformations.
Total Time
In total, expect to spend about 45 minutes enjoying this creative and festive activity. The reward? Beautifully dyed eggs that might just steal the show this Easter!
With a bit of patience and creativity, you’ll have something truly special to share with friends and family.
Nutritional Facts for Naturally Dyed Easter Eggs
In the world of festive preparations, naturally dyed Easter eggs bring vibrant color and joy alongside nutritious benefits. While you enjoy this delightful activity, it’s great to know the nutritional content of what you’re creating.
Calories
Each large egg contains approximately 70 calories, making naturally dyed Easter eggs a modest choice for a festive treat. This calorie count is primarily derived from the protein and healthy fats that eggs provide.
Protein
Eggs are an incredible source of protein, offering about 6 grams per large egg. This protein helps keep you feeling full longer—perfect for those Easter brunch celebrations where indulgence often takes the spotlight.
Sodium
When it comes to sodium, a large egg holds about 70 milligrams. This is a relatively low amount, especially considering that eggs still deliver essential nutrients without excessive salt content, making naturally dyed Easter eggs a smart choice for health-conscious eaters.
FAQs about Naturally Dyed Easter Eggs
The magic of naturally dyed Easter eggs begins with vibrant colors sourced from the world around us. Curious about how to master this art? Let’s dive into some frequently asked questions to help you on your Easter crafting journey.
How do you get different colors with natural dyes?
Achieving a rainbow of colors with naturally dyed Easter eggs is all about choice! Here’s a quick guide:
- Red: Use beets or red onion skins.
- Blue: Red cabbage or blueberries can give beautiful blue hues.
- Yellow/Gold: Turmeric or yellow onion skins will do the trick.
- Green: Spinach is your go-to for a lovely green shade.
- Brown: Coffee or tea can impart warm, earthy tones.
Surprising, right? The world is full of color just waiting to be unlocked!
Can I eat the eggs after dyeing?
Yes, you can! While naturally dyed Easter eggs are safe to eat, it’s best to use food-safe dyes. You can enjoy them in your favorite egg salad or deviled eggs after the festivities. Just remember to store the eggs in the refrigerator to ensure freshness.
What other natural ingredients can I use for dyeing eggs?
The possibilities are as vast as your creativity! Besides the items mentioned, you can explore:
- Paprika for warm orange tones.
- Avocado pits for soft pinks.
- Blackberries for rich purples.
Experimenting with ingredients you have at home not only makes the process fun but also connects you to the seasonal bounty around you. So why not embrace the adventure of naturally dyed Easter eggs this year?
Conclusion on Naturally Dyed Easter Eggs
Embracing the art of creating naturally dyed Easter eggs not only adds a vibrant touch to your celebrations but also connects you to a time-honored craft that’s rich in history. Using everyday ingredients like beet juice and turmeric, you can craft stunning hues while keeping it eco-friendly. Plus, think of how rewarding it is to gather around the table with friends or family, transforming simple eggs into pieces of art. As you dive into this colorful activity year after year, you’ll find joy in the process of experimentation and creativity that truly brings the spirit of Easter to life.
Print
Herb-Dyed Easter Eggs
- Total Time: 8 hours 40 minutes
- Yield: 12 eggs 1x
- Diet: Vegetarian
Description
A creative way to dye eggs using natural ingredients.
Ingredients
Scale
- 12 eggs
- 12 leaves (any of choice such as parsley, mint, basil, etc.)
- 1 pair nude panty hose
- enough onion peels to fill up the pot
- 8 cups water
- 1/4 cup white vinegar
- a touch of oil (for the end to make them shiny)
Instructions
- Cut the panty hose into pieces starting from the foot, each piece should be 5-6 inches in length and 4 inches in width.
- Prepare the foliage by selecting small leaves from outside or the grocery store. Good options include parsley, basil, mint, flowers, cilantro, etc. Soak each leaf in warm water to soften it.
- Take an egg, place a leaf in the middle on the clean side of the egg.
- Take a square of the stocking, place the egg gently inside, and tightly wrap it. Twist at the base and tie it securely like a balloon.
- Repeat for each egg.
- Fill a pot with half of the onion peels and place the wrapped eggs into the pot with the herb side down.
- Add half of the water and the vinegar, then add the remaining onion peels and the rest of the water.
- Simmer for 15-20 minutes. Avoid boiling vigorously as it may crack the eggs.
- After 15-20 minutes, remove from heat and let sit for a minimum of 8 hours or overnight in the fridge.
- For deeper color, use more onion peels and let sit longer.
- Once the time is up, cut the string, remove the herb, and let dry on a paper towel.
- Finally, cover each egg in a touch of oil to make them shiny.
Notes
- The longer you let the eggs soak in the dye solution, the deeper the color will be.
- For best results, use a variety of leaves and herbs.
- Make sure to keep the eggs in a cool place after dyeing.
- Prep Time: 20 minutes
- Cook Time: 20 minutes
- Category: Dessert
- Method: Boiling
- Cuisine: American
Nutrition
- Serving Size: 1 egg
- Calories: 70
- Sugar: 0g
- Sodium: 62mg
- Fat: 5g
- Saturated Fat: 1.5g
- Unsaturated Fat: 3g
- Trans Fat: 0g
- Carbohydrates: 1g
- Fiber: 0g
- Protein: 6g
- Cholesterol: 186mg