
Follow Me On Social Media!
King’s Hawaiian Cheesecake Danish: Irresistibly Creamy Delight
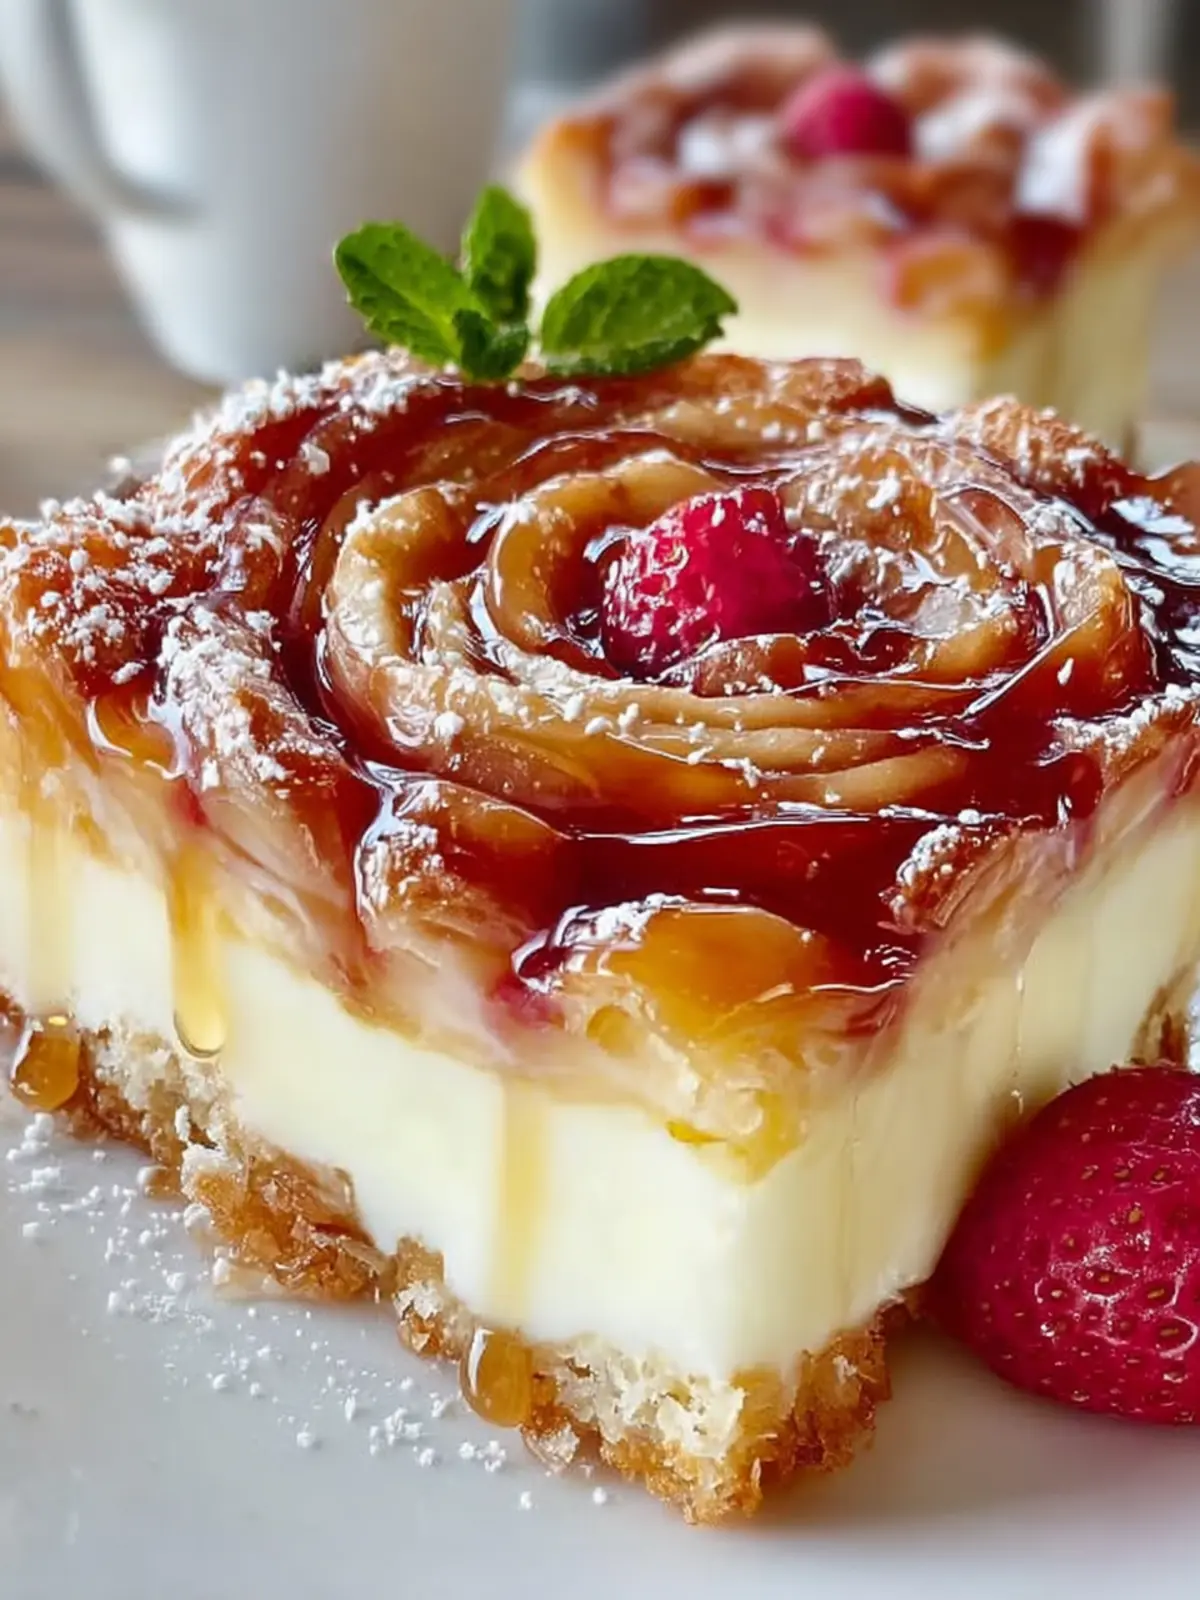
Introduction to King’s Hawaiian Cheesecake Danish
When it comes to the delightful world of breakfast pastries, the King’s Hawaiian Cheesecake Danish stands out as a sweet masterpiece that tempts your taste buds with every bite. Imagine waking up to the enticing aroma of a warm, flaky pastry enriched with creamy cheesecake filling, all wrapped in a luscious King’s Hawaiian bread dough. This isn’t just any ordinary Danish—it’s an experience that starts your day on a remarkably delicious note.
Every bite reveals a perfectly balanced flavor profile—sweet, creamy, and a bit tropical, thanks to the unique texture of King’s Hawaiian bread. The soft, pillowy dough holds onto the cheesecake filling beautifully, ensuring you enjoy a slice of bliss no matter how busy your morning can be. This recipe is not only straightforward but also allows for delightful variations, making it a canvas for your culinary creativity. You can easily add fruits like berries or a drizzle of chocolate for an extra indulgent touch.
What makes this Danish recipe a must-try?
-
Easy to Make: The King’s Hawaiian Cheesecake Danish is surprisingly simple to prepare. With just a handful of ingredients, you can create a pastry that feels gourmet. Whether you’re an experienced baker or a novice, this recipe will guide you through each step.
-
Crowd-Pleaser: Hosting a brunch or a casual gathering? This Danish is sure to impress. Its unique twist on a classic cheesecake will have everyone asking for seconds.
-
Versatile Options: While this recipe showcases the wonderful flavors of King’s Hawaiian bread, you can customize it to suit your tastes. Thinking of adding pineapple chunks or a swirl of lemon curd? Go for it! The possibilities are endless.
In a world where mornings can feel rushed and hectic, the King’s Hawaiian Cheesecake Danish offers a slice of joy that transforms breakfast into something special. It’s the perfect way to treat yourself and your loved ones, proving that life is a little sweeter when shared with good food. Now, let’s dive into the simple yet delicious ingredients that make this pastry so unforgettable.
Key Ingredients for King’s Hawaiian Cheesecake Danish
King’s Hawaiian Cheesecake Danish is a delightful twist on two of your favorite treats, merging the fluffy texture of sweet bread with a creamy cheesecake filling. Each ingredient plays a crucial role in creating that perfect combination of flavors and textures you’ll love.
-
King’s Hawaiian Rolls: The base of this recipe, these rolls bring a soft, sweet flavor that’s essential for an amazing Danish. Their delightful sweetness complements the cream cheese filling brilliantly.
-
Cream Cheese: This rich and creamy dairy product is the heart of the cheesecake filling. Ensure it’s softened to achieve that smooth and luscious texture everyone craves.
-
Powdered Sugar: A key component for sweetness in the filling, powdered sugar gives a smooth finish and helps to create that classic cheesecake taste without the graininess.
-
Eggs: Essential for binding the ingredients together, eggs add structure and creaminess to the filling, ensuring that every bite is delightful.
-
Vanilla Extract: This enhances the overall flavor of the filling, adding a warm and inviting aroma that makes your Danish not just a breakfast item but a comforting treat.
These key ingredients come together to create a wonderfully sweet and creamy King’s Hawaiian Cheesecake Danish that will brighten up your mornings!
Why You’ll Love This King’s Hawaiian Cheesecake Danish
Imagine waking up to the sweet aroma of freshly baked pastries, the promise of a delightful breakfast that could brighten even the gloomiest of mornings. This King’s Hawaiian Cheesecake Danish isn’t just any breakfast pastry; it’s an experience that combines creamy cheesecake goodness with the soft, fluffy texture of King’s Hawaiian bread, making every bite a true delight.
A Sweet Morning Treat
The magic of this recipe lies in its simplicity. With just a handful of ingredients, you’ll whip up something that looks and tastes like it came from a gourmet bakery. The combination of sweet cream cheese filling and warm, buttery dough is hard to resist. Whether you’re treating yourself or impressing guests, this Danish is bound to leave everyone wanting more.
Perfect for Any Occasion
This King’s Hawaiian Cheesecake Danish isn’t limited to breakfast. It serves as a fantastic snack, a delightful brunch centerpiece, or even a sweet touch at gatherings. Picture this: a weekend brunch with friends where this pastry steals the show, pairing it perfectly with fresh coffee or a refreshing mimosa.
Easy to Make
Even if you’re new to baking, this recipe is designed for success. The straightforward instructions make it almost foolproof, so you can enjoy the experience without the stress. Once you take your first bite, you’ll understand why this Danish is destined to become a beloved staple in your home.

Tips for Making the Perfect King’s Hawaiian Cheesecake Danish
Creating a sumptuous King’s Hawaiian Cheesecake Danish is all about blending the right techniques with quality ingredients. Whether you’re impressing guests or treating yourself, these tips will help elevate your pastry to the next level.
Choose Your Ingredients Wisely
-
King’s Hawaiian Bread: This sweet, fluffy bread is the star of your Danish. Its unique flavor complements the cheesecake filling perfectly. Make sure to select a fresh loaf for the best texture.
-
Cream Cheese: Opt for full-fat cream cheese for a rich and creamy filling. Soften it to room temperature before mixing; this ensures a smooth consistency without lumps.
-
Eggs: Fresh eggs not only add richness but also help bind your ingredients together. Make sure they’re at room temperature for the most even mixing.
Master the Assembly
-
Layering: Don’t rush the assembly process. Cut your King’s Hawaiian bread into uniform pieces and carefully layer them with the cheesecake filling; this creates a delightful balance of flavors in each bite.
-
Brushing with Butter: Brushing melted butter on top before baking gives your Danish a beautiful golden finish and enhances its delectable flavor.
Perfect Your Baking Time
- Watch Closely: Every oven is different. Start checking on your Danish a few minutes before the suggested baking time. You want it to be set but still slightly jiggly in the center for that perfect creamy texture.
By keeping these tips in mind, your King’s Hawaiian Cheesecake Danish will be a delightful addition to your breakfast table or brunch events. Enjoy the process and the sweet, creamy rewards!
Time Details for King’s Hawaiian Cheesecake Danish
Creating a delicious King’s Hawaiian Cheesecake Danish is a fulfilling culinary adventure that doesn’t take all day.
Preparation Time
Getting started with your King’s Hawaiian Cheesecake Danish takes about 15 minutes. This is when you’ll be mixing your ingredients and assembling the pastries, making it a breeze to whip up in the morning.
Baking Time
Once you’ve assembled your danish, it will bake to perfection in around 25-30 minutes. You’ll love the aroma that fills your kitchen as it bakes!
Total Time
In total, you’re looking at approximately 45 minutes from prep to enjoying this delightful pastry. It’s a perfect choice for a quick yet indulgent breakfast treat!

Nutritional Information for King’s Hawaiian Cheesecake Danish
When diving into a King’s Hawaiian Cheesecake Danish, you’re not only treating yourself to a delightful breakfast pastry but also considering the nutritional aspects of your culinary adventure. Understanding what you’re indulging in can enhance your overall experience and help you enjoy every bite guilt-free!
Calories
Each serving of this delectable danish contains approximately 300 calories. While it may seem a bit indulgent, remember that it’s a perfect morning pick-me-up that balances flavor and satisfaction without overwhelming your day.
Protein
In terms of protein, you can expect about 5 grams per serving. This touch of protein can help sustain your energy throughout the morning, making it an ideal companion with your morning coffee or tea.
Sodium
As for sodium, each King’s Hawaiian Cheesecake Danish contains around 320 milligrams. While it’s always good to keep an eye on sodium intake, enjoying this pastry as an occasional treat can fit nicely into a balanced diet without any stress.
Enjoy your delicious journey with this King’s Hawaiian Cheesecake Danish, and savor each moment as you indulge in a little morning luxury!
FAQs About King’s Hawaiian Cheesecake Danish
Can I make this Danish ahead of time?
Absolutely! Preparing your King’s Hawaiian Cheesecake Danish in advance can save you time during busy mornings. You can either make the filling a day before and assemble everything just before baking, or you can chill the assembled Danish in the fridge overnight. Just remember to cover it tightly to keep it fresh. When you’re ready, pop it in the oven, and you’ll enjoy a warm, flaky treat with minimal effort!
What can I serve with the Danish?
Pair your King’s Hawaiian Cheesecake Danish with a variety of accompaniments to elevate your breakfast experience. Here are some delightful options:
- Fresh fruit, such as berries or sliced mango
- A side of yogurt drizzled with honey
- A steaming cup of coffee or sweet tea
- A sprinkle of powdered sugar for a touch of sweetness
These combinations not only complement the flavors of the Danish but also add a colorful, fresh touch to your breakfast table.
How do I store leftovers of the Danish?
If you find yourself with leftover King’s Hawaiian Cheesecake Danish, you’ll want to store it properly to maintain its delightful texture. Wrap the Danish tightly in plastic wrap or store it in an airtight container at room temperature for up to 2 days. If you need to keep it longer, consider refrigerating it for up to a week. Just reheating it in the oven for a few minutes will bring back its fresh-baked goodness. Enjoy your delicious treat even after the first serving!
Conclusion on King’s Hawaiian Cheesecake Danish
The King’s Hawaiian Cheesecake Danish is not just another breakfast pastry; it’s a delightful experience combining the sweet, soft texture of Hawaiian bread with the indulgent creaminess of cheesecake filling. This simple recipe is a true crowd-pleaser, perfect for brunch gatherings or a cozy morning at home. As the melty cream cheese fills a golden, fluffy dough, you’re transported to a tropical paradise with every bite. Don’t hesitate to customize the filling or toppings to fit your taste, making this treat uniquely yours. Enjoying this joyous pastry is a lovely way to start any day, adding a sweet twist that will keep you coming back for more.
Print
Hawaiian Rolls Danish with Pineapple Glaze
- Total Time: 45 minutes
- Yield: 12 servings 1x
Description
A delicious and creamy Danish made with King’s Hawaiian Rolls and topped with a pineapple glaze.
Ingredients
Scale
- 1 package King’s Hawaiian Rolls (12 count), sliced in half horizontally
- 16 oz cream cheese, softened
- 1/2 cup granulated sugar
- 1 teaspoon vanilla extract
- 2 eggs
- 1 cup powdered sugar
- 2 tablespoons pineapple juice
- 1 teaspoon vanilla extract
- To taste toasted coconut flakes for garnish
Instructions
- Preheat your oven to 350°F (175°C). Lightly grease a 9×13 inch baking dish.
- Carefully slice the entire pack of King’s Hawaiian Rolls in half horizontally, keeping all tops and bottoms connected. Place the bottom half in the prepared baking dish.
- In a mixing bowl, beat together the softened cream cheese, granulated sugar, vanilla extract, and eggs until smooth and creamy.
- Spread the cheesecake mixture evenly over the bottom layer of the Hawaiian Rolls in the baking dish.
- Place the top half of the rolls onto the cheesecake layer, pressing down gently.
- Bake in the preheated oven for 25-30 minutes, or until the cheesecake is set and the tops of the rolls are lightly golden.
- While the Danish bakes, whisk together powdered sugar, pineapple juice, and vanilla extract in a small bowl until smooth.
- Once the Danish is done baking, remove it from the oven and immediately drizzle with the pineapple glaze. If desired, sprinkle toasted coconut flakes over the top for an added tropical flair.
Notes
- This dish is a great dessert or brunch option!
- For added flavor, consider switching up the glaze with different fruit juices.
- Prep Time: 15 minutes
- Cook Time: 30 minutes
- Category: Dessert
- Method: Baking
- Cuisine: American
Nutrition
- Serving Size: 1 piece
- Calories: 245
- Sugar: 14g
- Sodium: 190mg
- Fat: 11g
- Saturated Fat: 6g
- Unsaturated Fat: 4g
- Trans Fat: 0g
- Carbohydrates: 33g
- Fiber: 1g
- Protein: 3g
- Cholesterol: 70mg