Follow Me On Social Media!
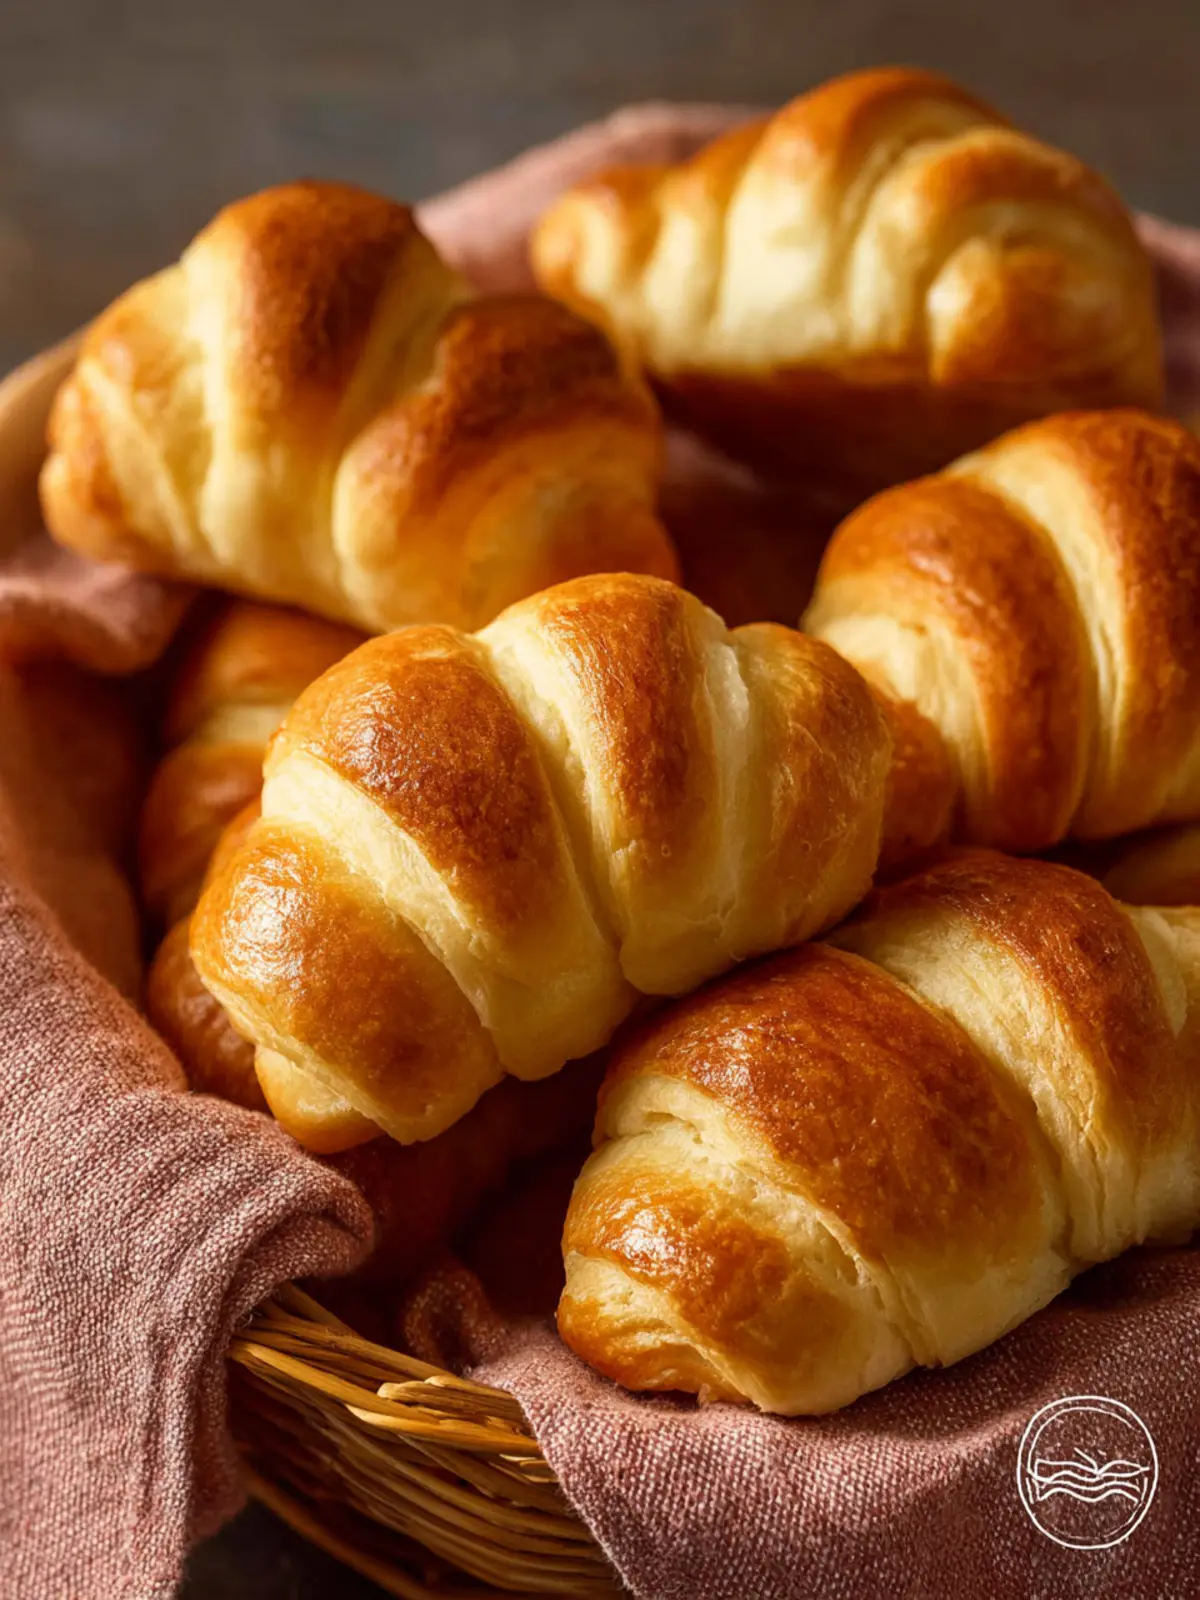
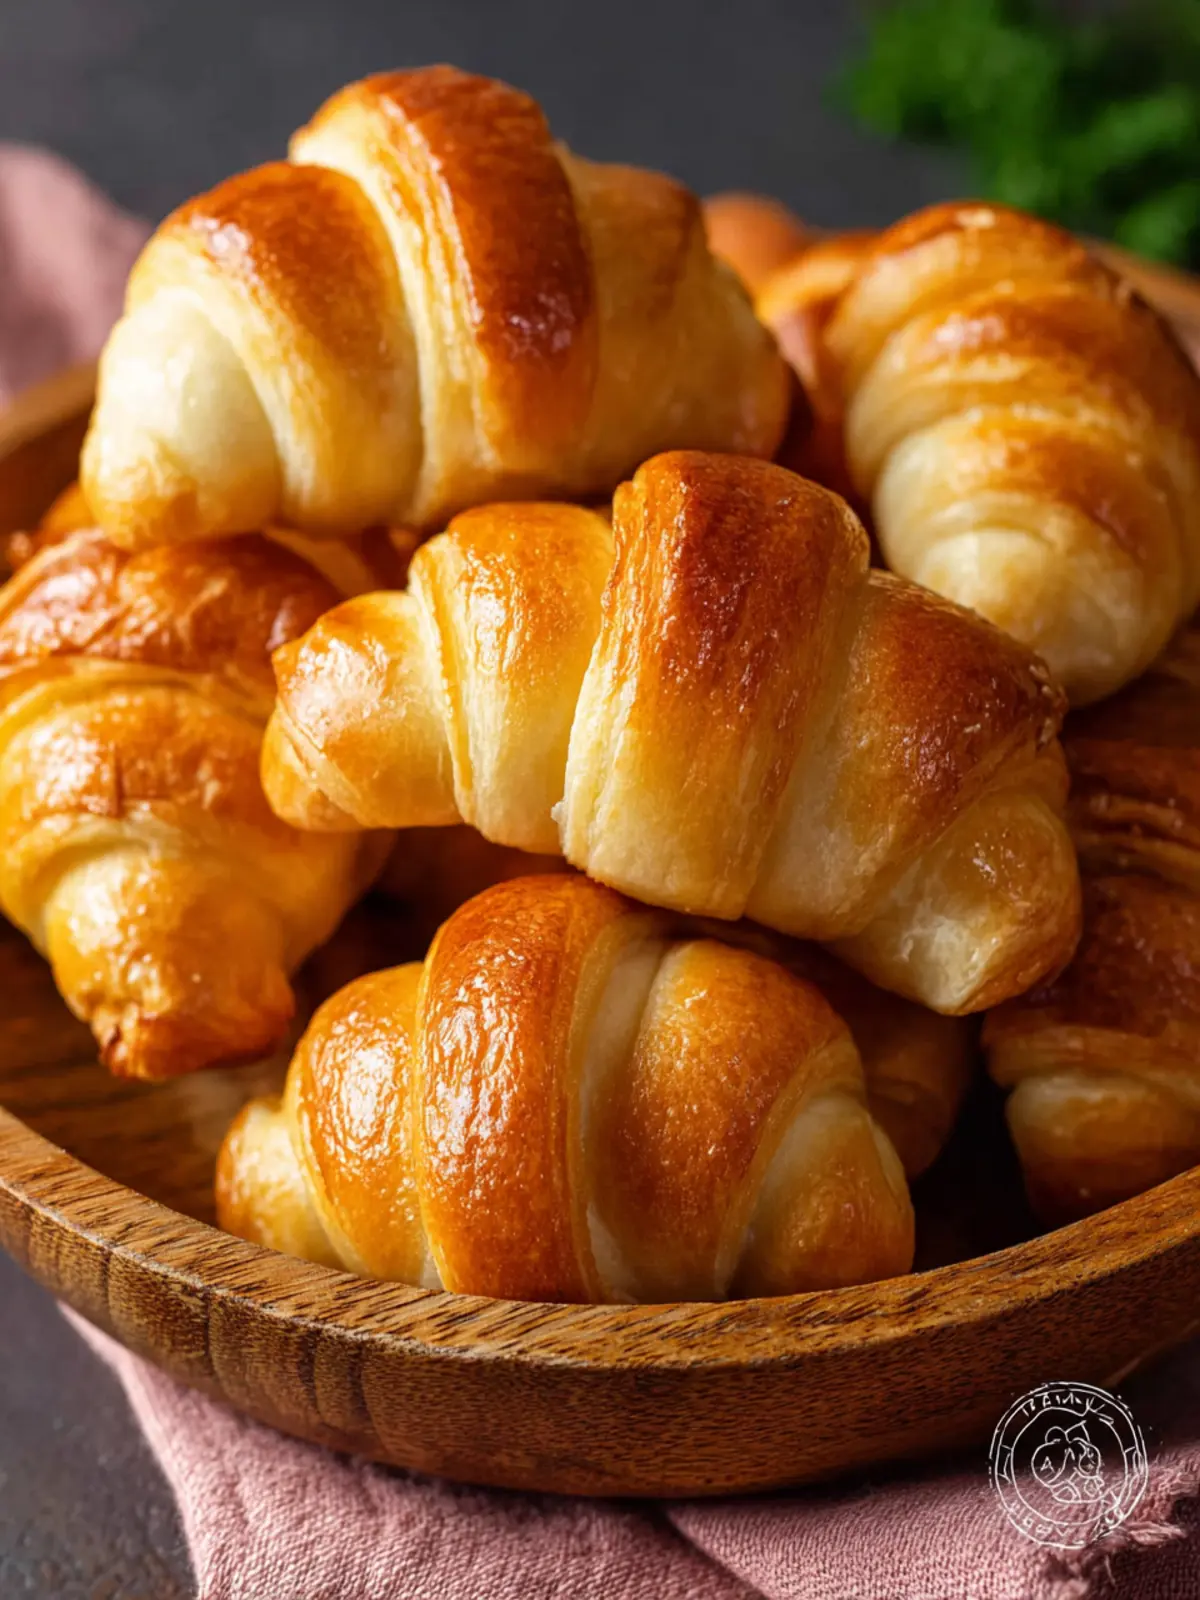
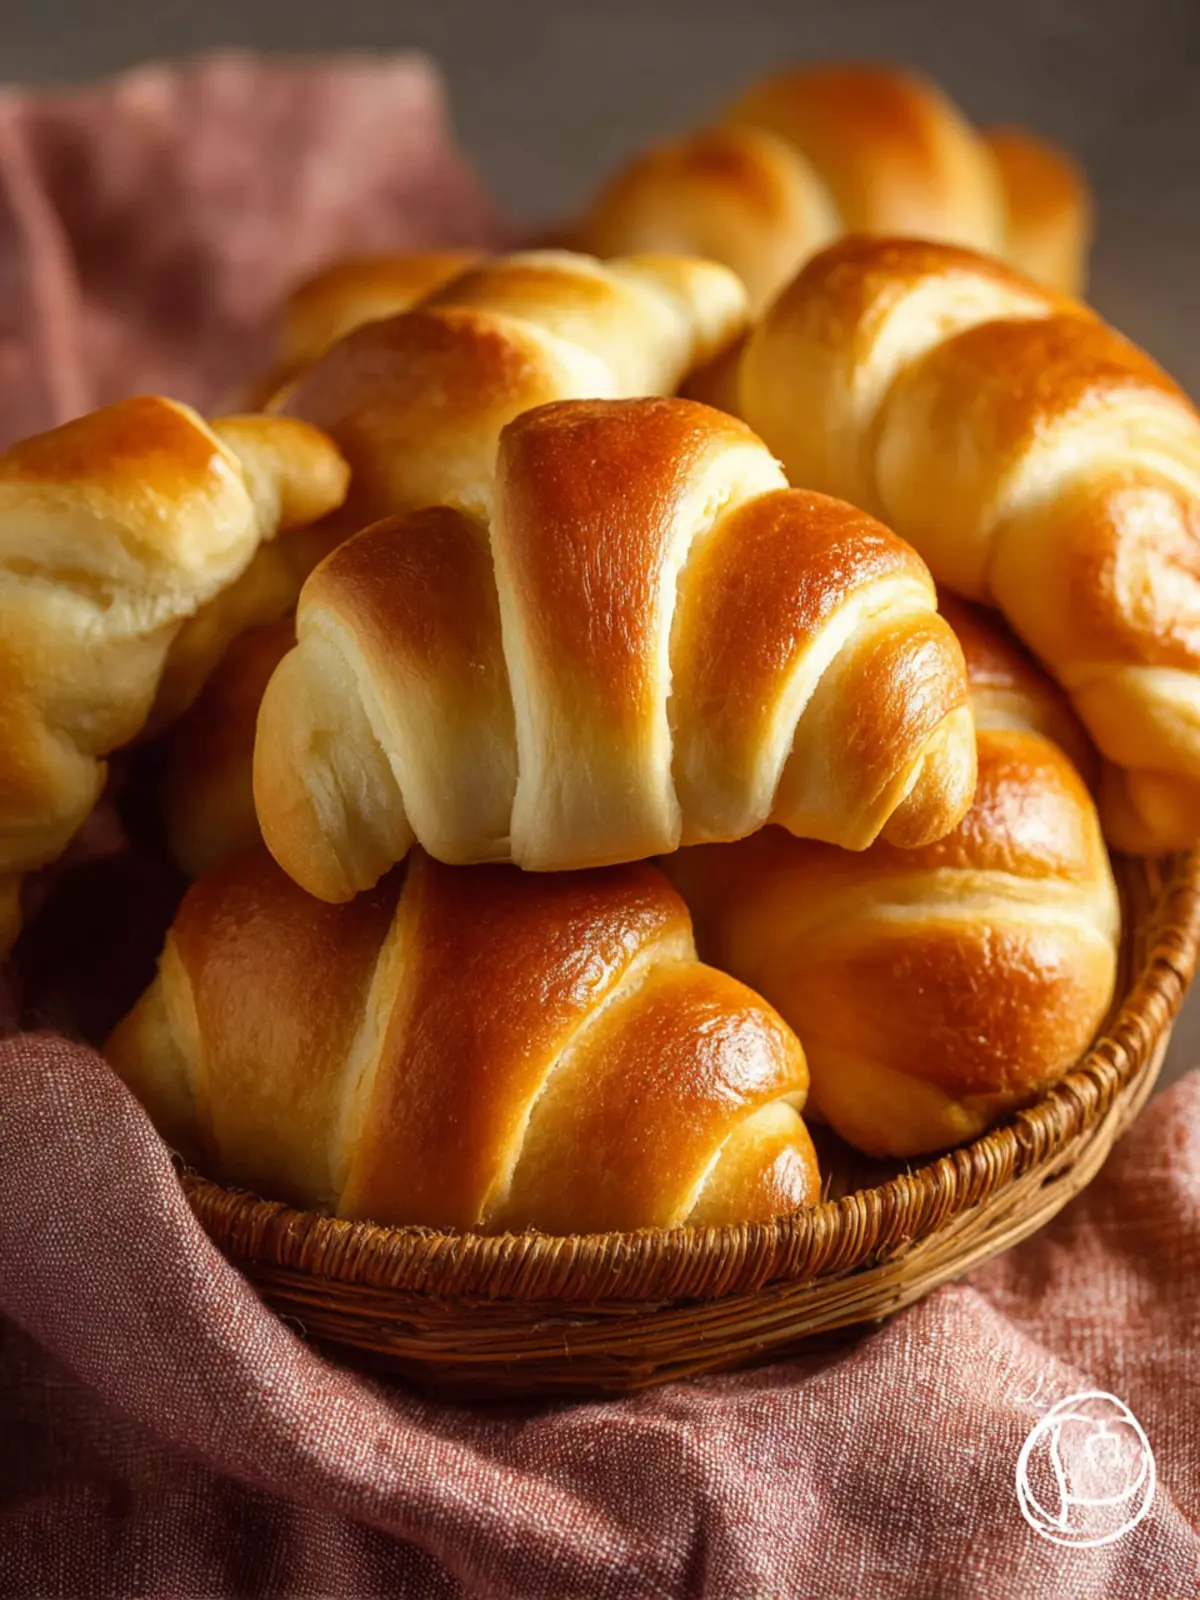
Homemade Crescent Rolls: Soft, Buttery Bliss at Home
Introduction to Homemade Crescent Rolls
There’s something exceptionally heartwarming about the aroma of homemade crescent rolls wafting through your kitchen, bringing back memories of family gatherings and cozy celebrations. The first time I tried my hand at making these delightful rolls, I was surprised by how simple yet satisfying the process can be. Imagine pulling a golden batch fresh out of the oven and tearing into one while it’s still warm, the buttery layers melting in your mouth. That’s the magic of homemade crescent rolls.
Baking at home not only fills your space with an inviting scent, but it also gives you the chance to create something comforting from scratch. Whether you’re preparing a festive meal or just wanting a warm treat on a chilly evening, the allure of freshly baked rolls is hard to resist. Plus, homemade rolls can elevate any meal—from breakfast with scrambled eggs to a festive dinner spread—it’s amazing how one dough can complement so many dishes.
The delight of baking fresh rolls at home
The joy of creating homemade crescent rolls lies beyond just the end product; it’s about the entire experience. When you mix the ingredients, knead the dough, and watch it transform, you connect with the art of baking in a way that’s deeply rewarding. You get to control the flavors and make them uniquely yours, perhaps adding a hint of garlic or herbs if you’re feeling adventurous.
Here’s a quick peek at the ingredients you’ll be working with:
- Flour: All-purpose flour serves as the wonderful base for your rolls, providing structure.
- Butter: A key player, both for flavor and for that irresistible flakiness. You’ll want to use it generously.
- Milk: This keeps your rolls soft and adds moisture—essential for that perfect bite.
- Yeast: Essential for leavening; it helps your rolls rise beautifully.
- Sugar: A touch of sweetness balances the savory notes, making each roll a treat.
Taking the time to bake your own homemade crescent rolls not only nourishes the body but also the soul, and every bite will remind you why this simple pleasure is worth it. So, lace up your apron, and let’s get rolling!
Key Ingredients for Homemade Crescent Rolls
Creating homemade crescent rolls is about more than just following a recipe; it’s about using the right ingredients to achieve that perfect buttery, flaky texture. Each element plays a vital role in crafting these delightful rolls.
-
Flour: All-purpose flour is your go-to here. It provides the structure needed while allowing the rolls to rise beautifully. If you’re in a pinch, a 1:1 gluten-free flour blend can work, though the texture may vary slightly.
-
Butter: For the best flavor and flakiness, you should use unsalted butter. It’s crucial to keep the butter cold, as this helps create those signature flaky layers. Plus, the richness complements the rolls perfectly.
-
Milk: Whole milk in this recipe adds creaminess and moisture. If you prefer a lighter option, you can use 2% milk, but the taste may be slightly less rich.
-
Yeast: Active dry yeast is essential for that lovely rise. Make sure it’s fresh for optimal proofing; when added to warm milk, it should foam within minutes, indicating it’s working its magic.
-
Sugar: A touch of sugar not only sweetens the rolls but also helps in activating the yeast. It’s the secret ingredient that aids in achieving that beautiful golden-brown color.
-
Salt: Don’t skip the salt! It enhances the flavor and balances the sweetness of the sugar, giving your rolls a well-rounded taste.
With these ingredients in hand, you’ll be well on your way to mastering homemade crescent rolls that are sure to impress friends and family.
Why You’ll Love This Recipe
The taste, texture, and versatility of homemade rolls
Imagine walking into a kitchen filled with the delightful aroma of freshly baked homemade crescent rolls, their golden hue beckoning you to indulge. These rolls are not just a side dish; they’re a celebration of flavor and texture. Flaky, buttery, and oh-so-light, each bite offers a delightful contrast that makes you want to savor every morsel. The layers melt in your mouth, leaving you craving more.
What truly sets these homemade crescent rolls apart is their versatility. Whether slathered with rich butter or paired with your favorite spreads, they adapt beautifully to suit any meal. Picture them as a charming addition to Sunday brunch, a comforting companion to soup, or even as a base for creative appetizers. They can stand alone or play supporting roles, making them an essential recipe to keep in your repertoire.
Beyond their fantastic taste and utility, the process of making these homemade crescent rolls becomes a cherished experience. It’s an excuse to gather friends and family, inviting everyone to share in the joy of creating something warm and delicious together. Trust me; once you try these rolls, they’ll become a beloved staple in your kitchen.
Variations of Homemade Crescent Rolls
Creating homemade crescent rolls is a delightful experience, and the versatility of this recipe allows you to tailor it to your taste buds. Why settle for plain when there are countless ways to elevate these buttery rolls?
Flavors and Twists to Make This Recipe Your Own
-
Herb and Garlic: Add finely chopped herbs like rosemary or thyme and minced garlic to the dough for an aromatic twist. This variation is perfect for serving with soups and stews, or even as a complement to your favorite pasta dish.
-
Sweet Cinnamon Rolls: Transform your crescent rolls into a sweet treat by incorporating brown sugar and cinnamon into the dough. Before rolling, spread a layer of softened butter, sprinkle on the cinnamon-sugar mixture, roll them up, and bake to perfection. This version is fantastic for breakfast or dessert!
-
Cheese Stuffed: For a cheesy delight, place a slice of cheese or a dollop of cream cheese inside each roll before baking. Feel free to explore various cheeses—from sharp cheddar to creamy goat cheese—making these rolls a savory crowd-pleaser.
-
Savory Spinach and Feta: Mix fresh spinach with crumbled feta cheese and use this as a filling for your crescent rolls. Bake until golden brown for a healthy, flavorful appetizer.
Experimenting with these different flavors and fillings not only enhances your homemade crescent rolls but also invites creativity into your kitchen. Your next batch can be uniquely yours!
Cooking Tips and Notes for Homemade Crescent Rolls
Creating homemade crescent rolls is not just about following a recipe; it’s an opportunity to craft something that brings warmth and comfort to your kitchen. Picture those flaky, buttery rolls just out of the oven—perfect for a Sunday brunch or a cozy weeknight dinner.
Essential Advice for Perfect Results Every Time
-
Temperature Matters: Make sure your butter is at the right temperature. While you want it to be soft, it shouldn’t be melty. The ideal texture for spreading will help give your rolls that delightful flakiness we all crave.
-
Knead with Care: When kneading your dough, aim for a smooth texture. Don’t rush through it; take about 5-10 minutes. This process develops gluten, which creates that chewy structure everyone loves.
-
Rising Time: Be patient during the first rise. A longer rise means more flavor. Look for the dough to double in size, which may take about 1-2 hours, depending on the warmth of your kitchen.
-
Cutting Technique: For evenly shaped rolls, when cutting the dough into triangles, start from the widest side and roll toward the point. This ensures each roll is consistent and bakes evenly.
-
Brush with Butter: After baking, brush your crescent rolls with melted butter immediately for an extra layer of richness and shine.
Enjoying your homemade crescent rolls is all about sharing them with loved ones—so don’t forget to make a little extra to spread the joy!
Serving Suggestions for Homemade Crescent Rolls
How to Enjoy Your Crescent Rolls at Meals or Snacks
There’s something truly delightful about homemade crescent rolls fresh out of the oven, with their buttery aroma filling the kitchen. These rolls are not just a side dish; they can elevate any meal or snack into a memorable occasion. Here are some fun and easy ways to enjoy them:
-
Breakfast Bliss: Warm up a crescent roll and spread a generous layer of your favorite jam or honey. Pair it with a side of fruit and yogurt for a wholesome start to your day.
-
Add to Dinner: Serve these homemade crescent rolls alongside hearty soups or stews. Their flaky texture is perfect for soaking up savory broths, creating a balanced meal that comforts the soul.
-
Snack Attack: If you’re looking for a quick snack, enjoy a crescent roll with cream cheese or avocado spread. The creaminess complements the roll’s flaky layers wonderfully.
-
Create a Sandwich: Slice a warm crescent roll in half and fill it with turkey, cheese, and your favorite veggies, or go vegetarian with hummus and fresh greens. The possibilities are endless!
-
Sweet Treat: For an indulgent dessert, fill your crescent rolls with chocolate or cinnamon sugar before baking. Drizzle with icing after they cool for an extra touch of sweetness.
With these serving suggestions, you can transform your homemade crescent rolls into versatile accompaniments for any occasion. Enjoy exploring the many delicious ways to savor them!
Time Breakdown for Homemade Crescent Rolls
When embarking on the delightful journey of making homemade crescent rolls, it’s helpful to have a clear timeline in mind to guide you through each tantalizing step.
Preparation time
Set aside about 20 minutes to mix the ingredients and roll out the dough. This time allows you to really enjoy the process, making sure your dough is perfectly combined.
Rising time
The dough will need about 1 to 1.5 hours to rise, allowing for that light and airy texture we all love. This is the perfect time to catch up on your favorite show or enjoy a cup of coffee.
Baking time
Baking will take approximately 12-15 minutes. Keep an eye on them as they bake to achieve that beautiful golden-brown hue.
Total time
Altogether, you’re looking at around 2 to 2.5 hours from start to finish. Not too long for such delicious homemade crescent rolls, right? Enjoy the sweet anticipation as those rolls rise and bake!
Nutritional Facts for Homemade Crescent Rolls
When you savor a warm, flaky bite of homemade crescent rolls, it’s often easy to forget about the nutrition packed within each delightful crescent. Understanding the nutritional components of this beloved recipe can enhance your cooking experience and help you make informed choices for you and your loved ones.
Overview of key nutritional components
- Calories: One serving of these crescent rolls can contain about 200-250 calories, depending on the size and ingredients you choose.
- Carbohydrates: These tasty rolls are primarily made up of carbohydrates, providing a quick energy source.
- Fats: Using butter ensures a rich flavor, contributing around 10 grams of fat per roll, beneficial for enhancing taste and texture.
- Protein: Each roll has a modest protein content, roughly 4-6 grams, which can aid in satiety.
- Vitamins and Minerals: The addition of whole ingredients, like eggs and milk, helps boost the nutritional profile with essential vitamins like Vitamins A and B.
So, the next time you whip up a batch of homemade crescent rolls, you can enjoy them fully aware of the delightful nutrition packed in every layer!
FAQs about Homemade Crescent Rolls
Homemade crescent rolls are a delightful addition to any meal, bringing warmth and buttery goodness right from your kitchen. As you embark on this culinary adventure, you might have a few questions. Let’s address some common inquiries to ensure your crescent rolls are perfectly baked, stored, and flavored!
How do I store homemade crescent rolls?
To keep your homemade crescent rolls fresh and delicious, store them in an airtight container at room temperature for up to two days. If you want to enjoy them longer, wrap them in plastic wrap and place them in the refrigerator for up to a week. Just be sure to let them come back to room temperature or warm them up for that fresh-baked taste!
Can I freeze homemade crescent rolls?
Absolutely! Freezing homemade crescent rolls is a great way to preserve their flaky goodness. Allow the rolls to cool completely after baking, then place them in a freezer-safe bag. They can be stored for up to three months. When you’re ready to enjoy, simply thaw them in the refrigerator overnight and reheat in the oven for that just-baked warmth.
What can I add to crescent rolls for extra flavor?
There are numerous ways to elevate the flavor of your homemade crescent rolls. Consider adding:
- Herbs: Fresh rosemary or thyme can be mixed into the dough for a savory twist.
- Cheese: A sprinkle of shredded cheese, like cheddar or parmesan, inside before rolling can provide a wonderful cheesy surprise.
- Garlic Butter: Brush the finished rolls with garlic-infused butter for an irresistible aroma.
- Cinnamon Sugar: For a sweet version, mix cinnamon and sugar and sprinkle it over buttered rolls before baking.
Experimenting with these additions can make your crescent rolls the star of the table! Enjoy your baking journey!
Conclusion on Homemade Crescent Rolls
Baking homemade crescent rolls fills your kitchen with a comforting aroma that’s hard to resist. The joy of watching dough transform into deliciously golden and flaky rolls brings an unparalleled sense of accomplishment. Whether you savor them for breakfast or serve them alongside dinner, the satisfaction of creating these delightful pastries from scratch cannot be overstated.
With each bite, you’ll appreciate not just the flavors but also the love and effort that went into making them. So, gather your ingredients and start rolling—your future self will thank you for the warm, buttery treats that elevate any meal!
Print
Crescent Rolls
- Total Time: 1 hour 30 minutes
- Yield: 24 rolls 1x
Description
Delicious homemade crescent rolls, perfect for any occasion!
Ingredients
Scale
- 1 teaspoon instant yeast
- 1 cup warm milk (110–115°F (43–46°C))
- 1 tablespoon granulated sugar
- 3 ½ cups all-purpose flour
- 1 ½ teaspoons table salt
- 1 large egg
- 4 tablespoons unsalted butter, softened
- 1 egg (beaten with 1 teaspoon water or milk (for egg wash, optional))
Instructions
- In a large bowl, combine the yeast, warm milk, sugar, flour, salt, and egg. Mix and knead until a soft dough forms.
- Add the softened butter and continue kneading until smooth and elastic, about 6 to 8 minutes.
- Place the dough in a greased bowl.
- Cover with plastic wrap or a damp towel, and let rise in a warm spot until doubled in size, about 1 hour.
- Punch down the dough and divide into 2 equal portions. Roll each into a 12-inch (30 cm) circle.
- Cut each circle into 12 wedges using a pizza cutter or a sharp knife. Roll each wedge up from the wide end to the tip to form a crescent shape.
- Arrange rolls on a parchment-lined baking sheet, cover lightly, and let rise while preheating the oven.
- Preheat the oven to 375°F (190°C). Brush with egg wash if desired.
- Bake for 12 minutes, or until golden brown. Cool slightly before serving.
Notes
- For best results, ensure your milk is at the right temperature to activate the yeast.
- These rolls can be served warm or at room temperature.
- Prep Time: 15 minutes
- Cook Time: 12 minutes
- Category: Bread
- Method: Baking
- Cuisine: American
Nutrition
- Serving Size: 1 roll
- Calories: 120
- Sugar: 1g
- Sodium: 200mg
- Fat: 5g
- Saturated Fat: 3g
- Unsaturated Fat: 2g
- Trans Fat: 0g
- Carbohydrates: 18g
- Fiber: 1g
- Protein: 3g
- Cholesterol: 30mg