Follow Me On Social Media!
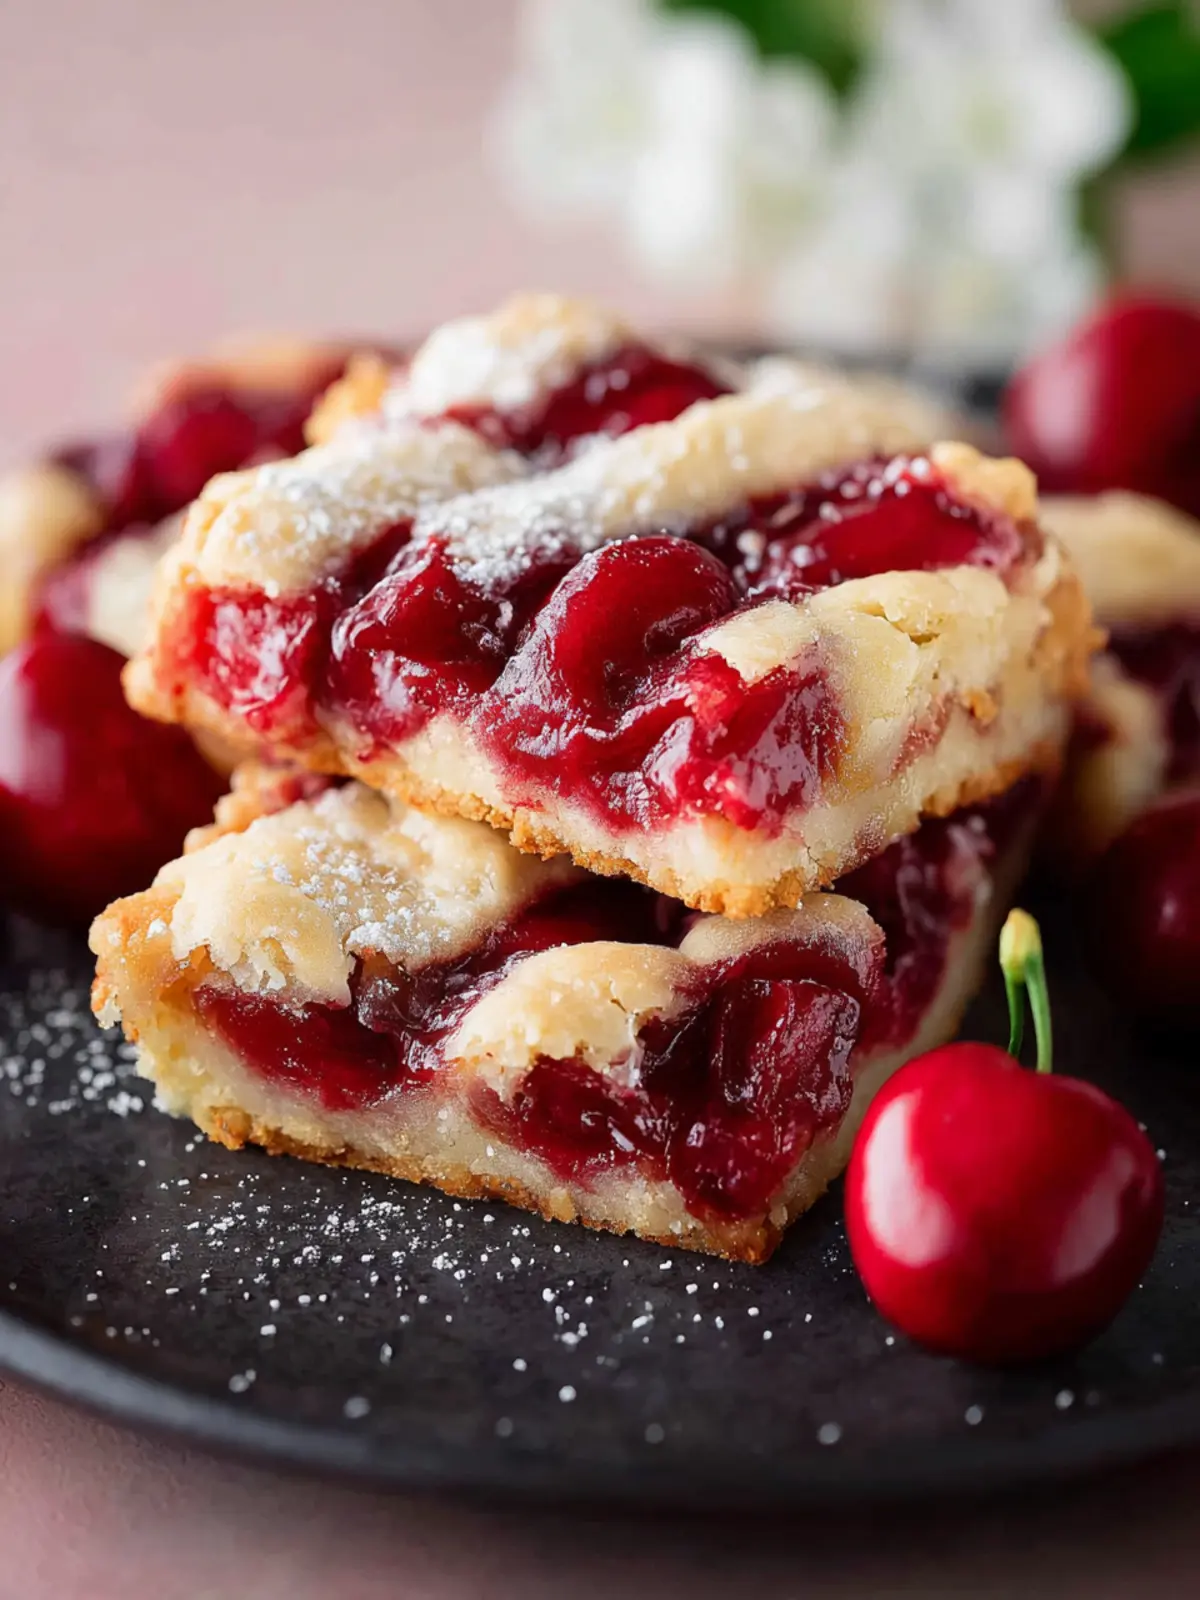
Easy Cherry Pie Bars for a Crowd: Irresistibly Sweet Delight
Introduction to Easy Cherry Pie Bars for a Crowd
Imagine a sunny afternoon, laughter filling the air, and the delightful aroma of baked goods wafting through your home. This is where easy cherry pie bars come in—they’re the perfect dessert to satisfy your sweet tooth and impress your guests. Whether you’re hosting a barbecue, family gathering, or just a cozy get-together with friends, these cherry pie bars are not only a treat to taste but also a feast for the eyes.
The genius of easy cherry pie bars lies in their simplicity and versatility. This dessert is essentially a cherry pie transformed into bar form, making it easier to serve and share. With a luscious cherry filling sandwiched between a buttery crust and crumble topping, they strike that perfect balance of tart and sweet. Every bite brings back nostalgic memories of summer picnics or visits to Grandma’s house, where cherry pie was a must-have.
What sets these bars apart is that they can be made in larger batches, making them an ideal choice for feeding a crowd without the fuss of individual servings. Plus, you can prepare them ahead of time, allowing you to enjoy the festivities without spending all day in the kitchen. I often add my twist by including a hint of almond extract, which complements the cherry flavor beautifully and adds a layer of complexity that people love.
Why are Easy Cherry Pie Bars a Must-Try Dessert?
- Crowd-Pleasing: These bars are irresistible and appeal to a wide audience, making them a fail-safe dessert for any occasion.
- Quick and Easy: With simple ingredients and straightforward instructions, you’ll have these bars ready in no time.
- Make-Ahead Friendly: Prepare them in advance and store them in the fridge; they hold up beautifully, ensuring you have dessert ready whenever you need it.
So, if you’re looking to bring a bit of joy to your next gathering, dive into making these easy cherry pie bars. Your friends and family will be asking for the recipe, and you’ll find it hard to resist a second helping!
Key Ingredients for Easy Cherry Pie Bars
Cherry Filling: For truly easy cherry pie bars, I recommend using fresh cherries if they are in season. Their natural sweetness and tartness really shine through. If fresh cherries aren’t available, frozen cherries work just as well—just be sure to thaw and drain them first to prevent excess moisture.
Butter: Butter plays a crucial role in both the crust and the filling of your easy cherry pie bars. I like to use unsalted butter for the crust, as it allows me to control the saltiness of the final product. The butter creates a tender and flaky crust that pairs perfectly with the cherry filling.
Sugar: Granulated sugar is key for both sweetness and balance. I use a generous amount in the filling to enhance the cherries’ natural flavors, while a little sugar in the crust helps it brown beautifully.
Flour: All-purpose flour is essential in the crust to give it the perfect texture. It holds everything together and provides the structural support needed.
Baking Powder: This little ingredient is important for creating that lovely, light texture in the crust. It gives your easy cherry pie bars the lift they need to be just right.
Salt: A pinch of salt enhances the sweetness of the sugar and balances the flavors, making each bite of your dessert utterly delightful.
Why You’ll Love These Easy Cherry Pie Bars
There’s something truly enchanting about easy cherry pie bars. They evoke memories of warm summer days spent outdoors, with the comforting aroma of baked goods wafting through the air. Picture this: a gathering with friends, the sun setting, and everyone reaching for a slice of these delectable treats. It’s not just about dessert; it’s about creating memories and indulging in something simply delightful.
The beauty of these bars lies in their simplicity, making them perfect for any occasion or crowd. Easy to prepare and even easier to share, cherry pie bars are a great way to impress without the stress. The vibrant cherry filling, paired with a buttery, crumbly crust, strikes the ideal balance of sweet and tart.
- Simple Preparation: The step-by-step instructions make it a breeze, even for novice bakers.
- Crowd-Pleasing Flavor: With juicy cherries bursting with flavor, everyone will be asking for seconds.
- Versatile Serving: Serve them warm with ice cream, or at room temperature for a classic bite-sized dessert.
Once you bite into these delightful bars, you’ll understand why they’ve become a favorite for gatherings and celebrations. Get ready to fall in love with easy cherry pie bars!
Variations to Try With Easy Cherry Pie Bars
When it comes to easy cherry pie bars, there’s room for creative twists that elevate the flavor and presentation. Experimenting with different ingredients can make your baking experience not only fun but also rewarding. Here are some tasty variations you might consider:
Swap the Fruit
While cherries are the star of this recipe, don’t shy away from using other fruits. Blueberries, raspberries, or even a mix of seasonal fruits can produce delicious results. Just be mindful of the sweetness of your fruit choice, as some may require more sugar to balance the tartness.
Add a Citrus Twist
Zest is the secret ingredient many overlook. Adding a teaspoon of lemon or orange zest to the filling adds a refreshing brightness and balances the sweetness of the cherries. This little touch can make your easy cherry pie bars feel gourmet!
Experiment with Spices
Give your bars a little extra warmth by tossing in spices like cinnamon, nutmeg, or even ginger. These spices can enhance the flavor profile and create a cozy, comforting dessert that’s perfect for gatherings.
Try a Different Crust
While the classic buttery crust is always a winner, consider using graham cracker crumbs or almond flour for a gluten-free option. A cookie crust, such as Oreos or shortbread, can also provide a fun and unique twist that pairs well with the cherry filling.
Top with Whipped Cream or Ice Cream
Finish your easy cherry pie bars with a dollop of freshly whipped cream or a scoop of vanilla ice cream. This indulgent touch not only adds creaminess but also elevates the overall dessert experience.
Try one or a combination of these delicious variations, and you’ll see how versatile easy cherry pie bars can be!
Cooking Tips and Notes for Perfect Easy Cherry Pie Bars
Mastering easy cherry pie bars can turn any gathering into a delightful occasion. Here are some essential tips to ensure your dessert shines.
Use Quality Cherries
Fresh or frozen cherries work beautifully, but if you opt for fresh, choose plump, ripe ones for maximum sweetness. If using frozen, allow them to thaw and drain excess moisture to prevent a soggy crust.
Get the Right Consistency
When mixing your crust and topping, aim for a crumbly texture that holds together but isn’t overly wet. If your dough is too sticky, add a little more flour until you achieve the right balance.
Chilling is Key
Allow the dough to chill for about 30 minutes before pressing it into the pan. This not only enhances flavor but also makes it easier to handle. Chilling also helps to prevent the bars from spreading too much during baking.
Don’t Skip the Topping
A sprinkle of coarse sugar on top before baking adds a lovely crunch and a sweet finish. You might even consider adding a dash of cinnamon for extra warmth.
Cool Before Serving
Let your easy cherry pie bars cool completely before slicing. This helps them set up nicely, allowing for clean cuts and perfect presentation.
With these tips in your back pocket, you’re all set for a fantastic batch of cherry pie bars that will impress your friends and family!
Serving Suggestions for Easy Cherry Pie Bars
Crafting the perfect easy cherry pie bars isn’t just about the baking; it’s also about how you present them! Imagine serving these delightful treats at a family picnic or casual gathering, each slice bursting with juicy cherry goodness. Here are some creative serving suggestions to elevate your dessert game:
Enjoy Warm or Chilled
- Warm and gooey: Serve your bars fresh out of the oven for a melty experience. A scoop of vanilla ice cream on top transforms each bite into a decadent delight.
- Chilled and refreshing: For warm summer days, consider refrigerating the bars before serving. They make a light and refreshing dessert, perfect for hot afternoons.
Pair with Whipped Cream
A dollop of freshly whipped cream on the side adds a lightness that beautifully complements the rich cherry flavor. You could even flavor the cream with a hint of almond extract to tie everything together!
Add a Crunchy Topping
For a little textural contrast, sprinkle some crushed nuts—like almonds or pecans—over the top. This crunch adds not only flavor but also visual interest to your beautiful bars.
Serve with Coffee or Tea
There’s something wonderfully satisfying about pairing sweet treats with coffee or a warm cup of tea. Your guests will appreciate this thoughtful touch, making your gathering that much more special.
These simple yet effective serving ideas will surely make your easy cherry pie bars a memorable hit at any event!
Time Breakdown for Easy Cherry Pie Bars
Creating easy cherry pie bars is not only a treat for the taste buds but also a delightful way to spend a little time in the kitchen. Here’s a simple breakdown of the time you’ll need to whip up this delicious dessert.
Preparation Time
You’ll spend about 15 minutes preparing the ingredients and assembling your bars. This includes washing and pitting the cherries, mixing the dough, and spreading the cherry filling.
Baking Time
Once you pop them in the oven, let the magic happen for about 30 minutes. Keep an eye out for that golden-brown crust, which means they’re ready to come out.
Total Time
In total, you’re looking at approximately 45 minutes from start to finish. Just enough time to kick back while they bake and enjoy the tantalizing aroma that fills your kitchen!
Nutritional Facts for Easy Cherry Pie Bars
Exploring the nutritional facts for easy cherry pie bars can fuel your conversations around treats that don’t compromise on flavor while keeping an eye on health. These bars bring comfort and nostalgia without ruining your dietary goals.
Calories
Each serving of these easy cherry pie bars packs approximately 200 calories. This makes them a sweet indulgence that won’t derail your efforts, especially when shared with friends and family during gatherings.
Sugar Content
With around 12 grams of sugar per serving, these bars strike a balance between sweetness and health. Using real cherries adds natural sugars and a burst of flavor without overly boosting the sugar count.
Fat Content
Netting about 8 grams of fat, primarily from the buttery crust, these bars deliver richness without going overboard. For a lighter twist, consider using a butter substitute like coconut oil that retains deliciousness while reducing saturated fat.
Conclusion
Enjoying easy cherry pie bars isn’t just about taste; it’s about finding that sweet spot between flavor and nutritional balance!
FAQs About Easy Cherry Pie Bars
When you dive into the delightful world of easy cherry pie bars, questions are bound to pop up! Here are some answers to common queries that will help enhance your baking experience.
Can I use fresh cherries instead of canned?
Absolutely! Using fresh cherries in your easy cherry pie bars can elevate the flavor profile, providing a tart and juicy bite that canned cherries sometimes lack. Just keep in mind that you may need to add a bit more sugar to balance out the tartness. Simply pit and chop the cherries, and toss them with a bit of cornstarch to help thicken the filling. This small tweak can create a fresh and delectable twist on the classic recipe.
How do I store leftover cherry pie bars?
Storing any leftovers is straightforward. Once your easy cherry pie bars have cooled, cover them with plastic wrap or aluminum foil or transfer them to an airtight container. They can be stored at room temperature for up to two days or in the refrigerator for about a week. If you’re looking to keep them longer, refrigeration is your best bet!
Can I freeze these bars for later?
Yes, you can! Freezing easy cherry pie bars is a great way to enjoy them later. Wrap the cooled bars tightly in plastic wrap or foil, and then place them in a freezer-safe container. They can last up to three months in the freezer. Whenever you’re in the mood for a sweet treat, simply thaw them overnight in the fridge, and you’ll be right back to that fresh-baked flavor!
Conclusion on Easy Cherry Pie Bars for a Crowd
As we wrap up our journey into the delightful world of easy cherry pie bars, it’s clear that this recipe is a true crowd-pleaser. Whether you’re hosting a large gathering or simply craving a sweet treat, these bars promise to satisfy every palate. With their buttery, crumbly crust and luscious cherry filling, they strike the perfect balance between indulgence and nostalgia.
Remember, sharing is caring. As you serve these bars to friends and family, you’ll create cherished memories along with every delicious bite. So don your apron, gather those ingredients, and let the baking begin—it’s time to share the joy of cherry pie bars!
Print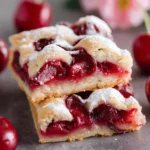
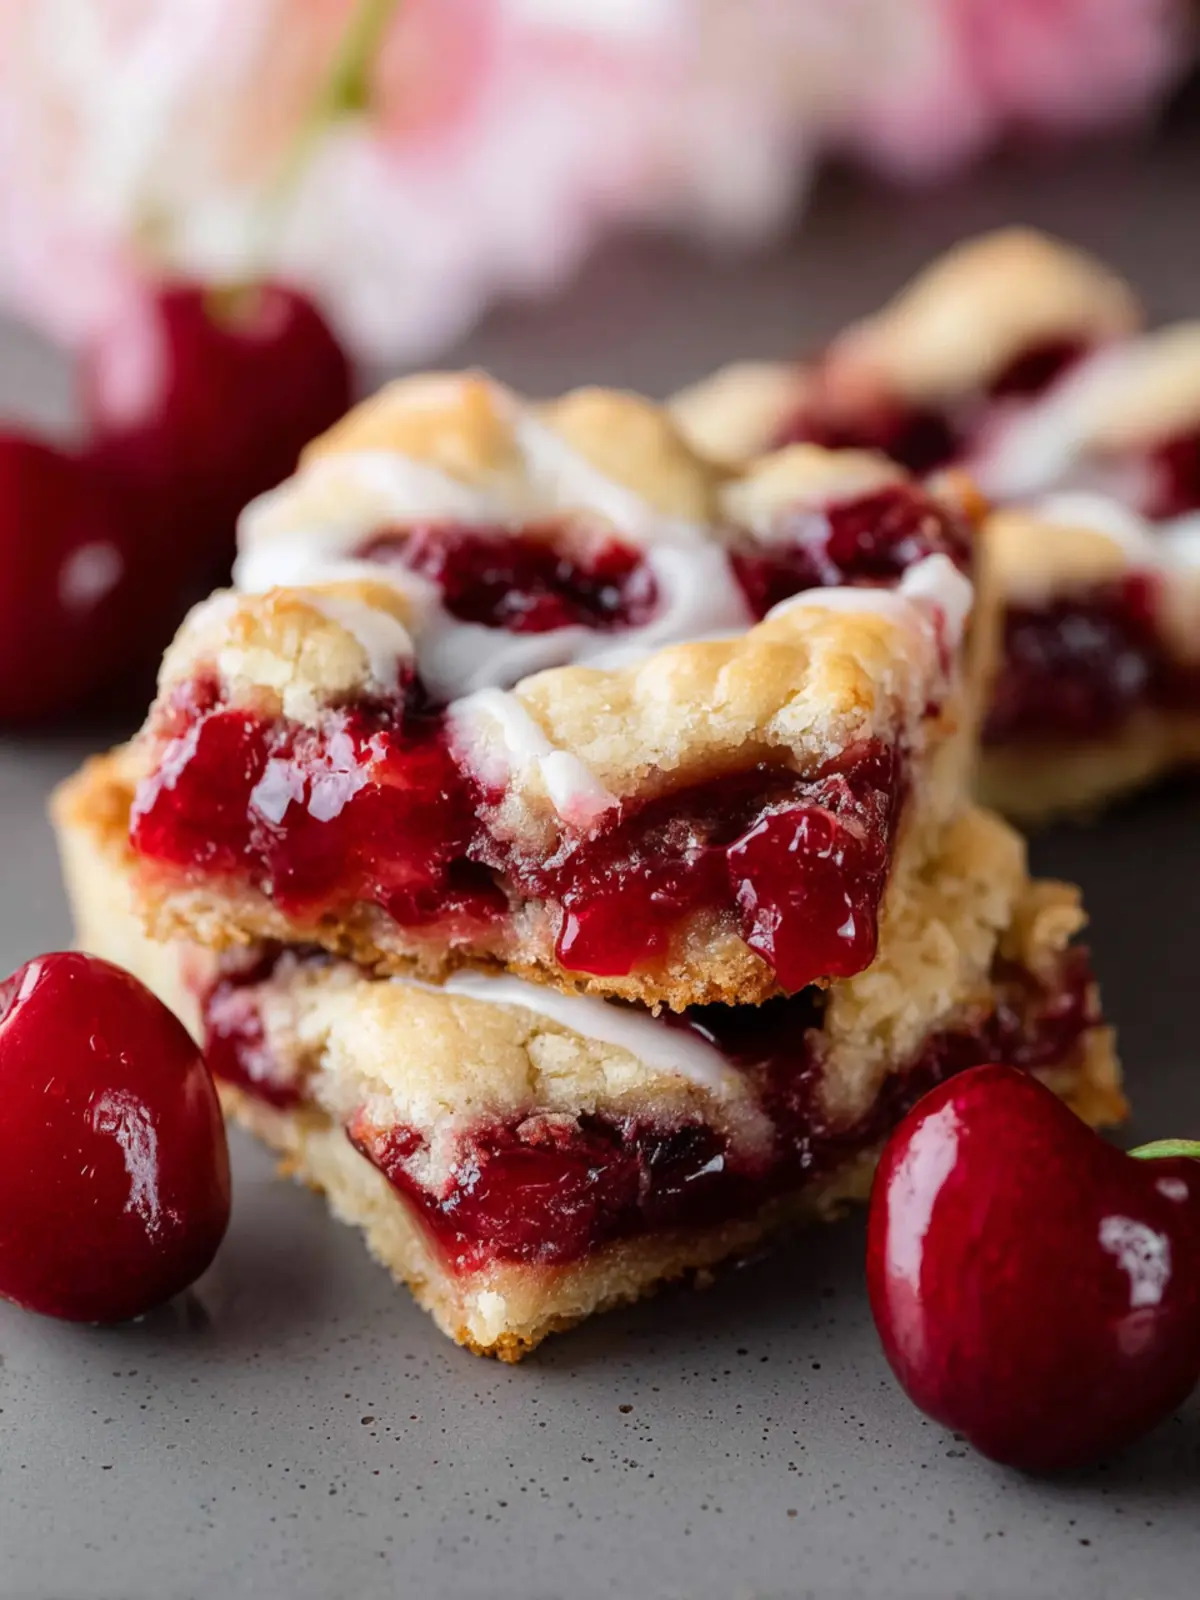
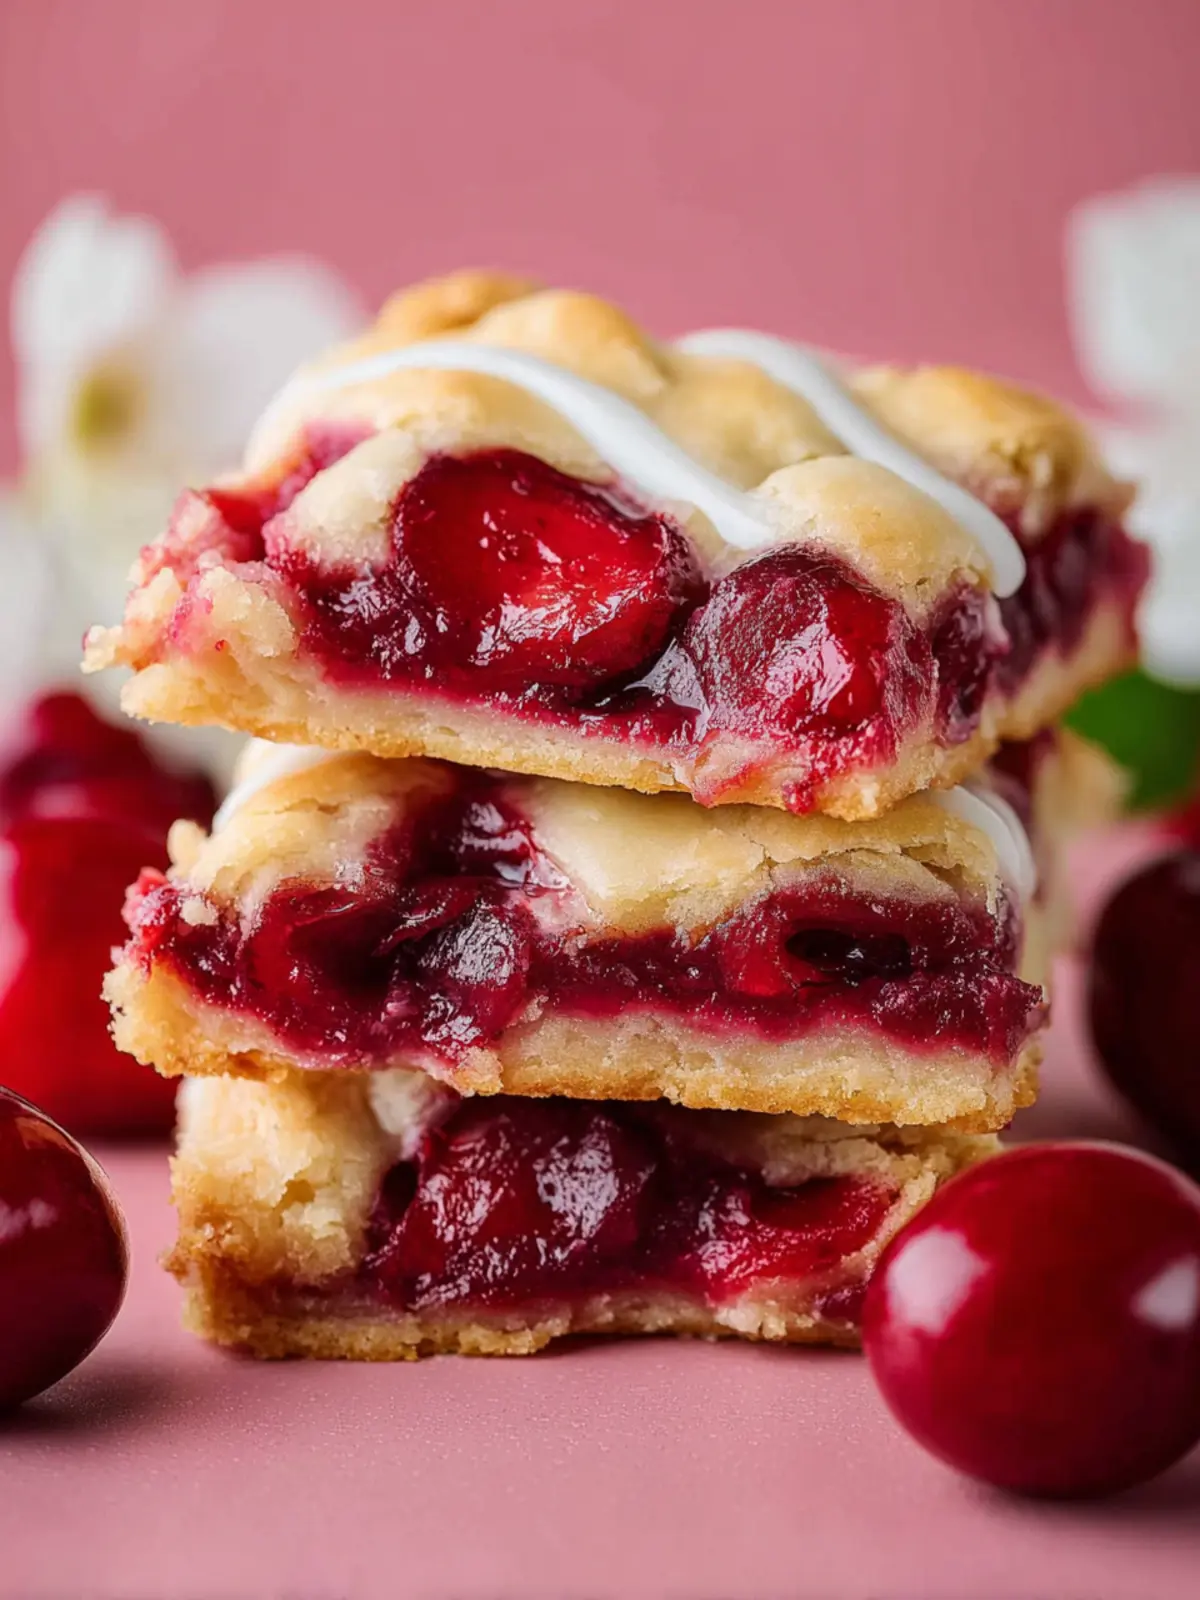
Cherry Pie Bars
- Total Time: 55 minutes
- Yield: 24 servings 1x
- Diet: Vegetarian
Description
Delicious cherry pie bars with a buttery crust and sweet cherry filling, topped with a light glaze.
Ingredients
Scale
- 1 cup butter, softened at room temperature
- 2 cups granulated sugar
- 1 teaspoon salt
- 4 large eggs, room temperature
- 1 teaspoon vanilla extract
- 1/4 teaspoon almond extract
- 3 cups all-purpose flour
- 2 cans (540ml each) cherry pie filling
- 1 and 1/2 cups powdered sugar (for glaze)
- 1/2 teaspoon vanilla (for glaze)
- 2–3 tablespoons milk (for glaze)
Instructions
- Grease a 15x10x1-inch baking pan. Preheat oven to 350°F.
- In a large mixing bowl, or bowl from stand mixer, cream together softened butter, granulated sugar and salt for 5 to 7 minutes until light and fluffy. The mixture should be light and lemon-colored.
- Next, add in the eggs, one at a time, beating well after each addition.
- Beat in vanilla and almond extracts.
- Gradually add in flour, one cup at a time, stirring just until combined.
- Remove 3 cups of the dough and spread evenly into prepared baking pan.
- Top with both cans of cherry pie filling, leaving about 1 and 1/2 inches around the edges.
- Drop the remaining dough by teaspoonfuls over the cherry pie filling. A small cookie scoop works great!
- Bake in 350°F oven for 35 to 40 minutes or until light golden brown. Cool completely in pan on wire cooling rack.
- In a small bowl, whisk together powdered sugar, vanilla extract and enough milk to reach desired consistency. Drizzle over top of cooled bars.
Notes
- This recipe yields delicious cherry pie bars that are perfect for parties and gatherings.
- Make sure to cool the bars completely before drizzling the glaze to avoid melting.
- Store leftovers in an airtight container to keep them fresh.
- Prep Time: 15 minutes
- Cook Time: 40 minutes
- Category: Desserts
- Method: Baking
- Cuisine: American
Nutrition
- Serving Size: 1 bar
- Calories: 250
- Sugar: 15g
- Sodium: 150mg
- Fat: 10g
- Saturated Fat: 5g
- Unsaturated Fat: 4g
- Trans Fat: 0g
- Carbohydrates: 35g
- Fiber: 1g
- Protein: 3g
- Cholesterol: 70mg